
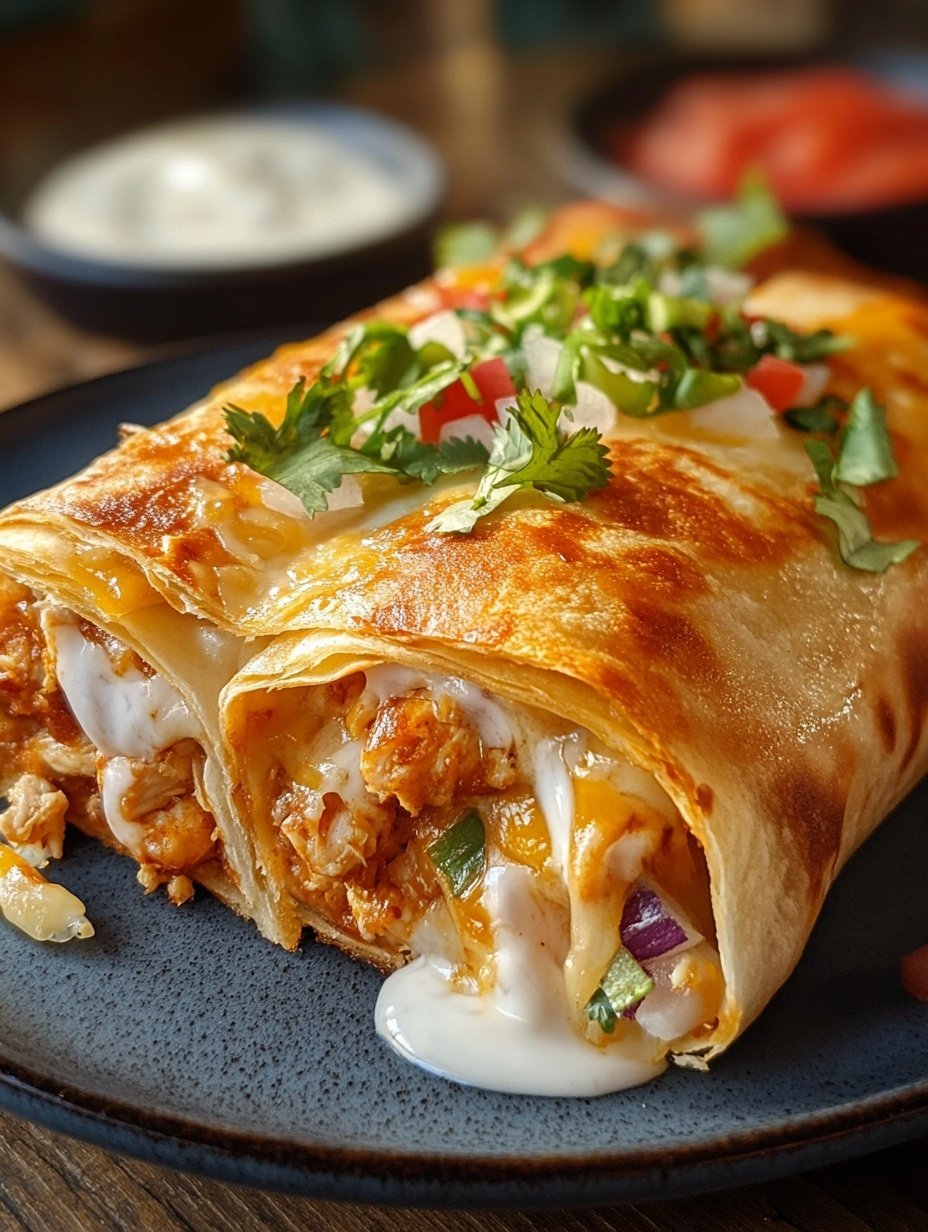
As a baker and someone who loves experimenting in the kitchen, I’m always looking for recipes that bring both comfort and excitement to the table. One of my favorite creations is CHI-CHI’S Baked Chicken Chimichangas. These golden, crispy delights are the perfect combination of hearty chicken filling wrapped in a soft tortilla, baked to perfection, and packed with flavor. I first tried making them at home when I wanted a meal that felt indulgent but was healthier than deep-fried versions. The result was so satisfying that it instantly became a family favorite.
You will love this recipe because it’s the ultimate blend of convenience, flavor, and versatility. Unlike traditional fried chimichangas, baking them reduces the grease while still keeping the tortilla crisp. The filling is savory, rich, and customizable, allowing you to add your favorite vegetables, cheeses, or spices. Every bite has a delightful crunch on the outside and a juicy, flavorful center that keeps everyone coming back for more.
One of the best things about this recipe is how versatile it is. You can make it ahead of time, freeze it, or adjust the ingredients to match your taste preferences. It’s perfect for a weeknight dinner, a family gathering, or even a casual weekend lunch. The baked approach also makes it a healthier option, without compromising on taste, which is always a win in my kitchen.
Another reason I love sharing this recipe is how affordable it is. With simple pantry staples like chicken, tortillas, cheese, and a few spices, you can create a meal that feels restaurant-quality without spending a fortune. It’s also a recipe that reduces food waste because you can incorporate leftover chicken or vegetables from previous meals.
Here’s what you’ll need to make these Baked Chicken Chimichangas:
-
Chicken breast, cooked and shredded
-
Chicken ham, diced
-
Turkey bacon, cooked and crumbled
-
Shredded cheese (cheddar or Mexican blend)
-
Flour tortillas
-
Onions and bell peppers, finely chopped
-
Garlic, minced
-
Salsa or tomato sauce
-
Sour cream (for serving)
-
Olive oil or cooking spray
-
Spices: cumin, paprika, chili powder, salt, and pepper
With these simple ingredients, you’re ready to create a delicious, crowd-pleasing meal that’s both comforting and exciting.
How to Prepare CHI-CHI’S Baked Chicken Chimichangas
Preparing CHI-CHI’S Baked Chicken Chimichangas is easier than it looks, and the process is both fun and satisfying. With clear steps, you can assemble these flavorful delights quickly, and the result is a perfectly baked, crispy meal that everyone will love.
Step 1: Prepare the Ingredients
Start by gathering all your ingredients. Ensure your chicken is fully cooked and shredded, and your turkey bacon is crisped and crumbled. Dice the chicken ham and chop the onions, bell peppers, and garlic. Pre-shredded cheese works well, but freshly grated cheese melts beautifully and enhances the flavor.
Step 2: Sauté the Vegetables
Heat a tablespoon of olive oil in a large skillet over medium heat. Add the chopped onions and bell peppers first, stirring frequently for about 3–4 minutes until they become tender. Then, add the minced garlic and cook for an additional 30 seconds to release its aroma. Be careful not to burn the garlic, as it can turn bitter.
Step 3: Combine the Filling
Reduce the heat to low, then add the shredded chicken, diced chicken ham, and crumbled turkey bacon to the skillet. Sprinkle in your spices—cumin, paprika, chili powder, salt, and pepper—and stir well to ensure the seasonings coat all the ingredients evenly. Finally, stir in half of the shredded cheese and a few tablespoons of salsa or tomato sauce to bind the mixture. The filling should be flavorful, moist, and slightly saucy, making it easy to roll into tortillas.
Step 4: Assemble the Chimichangas
Preheat your oven to 400°F (200°C). Lay a flour tortilla flat on a clean surface. Spoon a generous amount of the chicken filling into the center, being careful not to overfill. Fold in the sides of the tortilla, then roll it tightly from one end to the other to form a sealed chimichanga. Repeat this process with the remaining tortillas and filling. To ensure a crispy exterior, lightly brush each rolled chimichanga with olive oil or spray with cooking spray.
Step 5: Bake to Perfection
Place the chimichangas seam-side down on a baking sheet lined with parchment paper. Bake in the preheated oven for 20–25 minutes, turning them halfway through to achieve an even golden-brown color. Keep a close eye on them during the last few minutes, as tortillas can brown quickly. The cheese inside will melt and the tortilla will become crispy without deep-frying.
Step 6: Serve and Customize
Once baked, remove the chimichangas from the oven and let them cool for a few minutes. Serve with sour cream, additional salsa, or guacamole on the side. For customization, you can add black beans, corn, or jalapeños to the filling for extra flavor and texture. You can also substitute different cheeses or use low-fat options to make the dish lighter.
These baked chicken chimichangas are not only quick and easy but also popular with many people because of their satisfying crunch and savory filling. They can be served as a family dinner, a party appetizer, or a meal prep option. Their versatility, affordability, and ability to please a crowd make them a staple recipe in my kitchen.
The combination of baked, crispy tortillas with rich, flavorful filling ensures every bite is a delightful experience. Whether you follow the recipe exactly or add your personal twist, these chimichangas always impress. The step-by-step approach guarantees consistency while allowing you to enjoy the process without stress.
PrintSEO Optimized Baked Chicken Chimichangas Recipe

These CHI-CHI’S Baked Chicken Chimichangas are a healthier twist on a classic favorite. Crispy on the outside and filled with a savory chicken, chicken ham, and turkey bacon mixture, they are perfect for family dinners, meal prep, or entertaining guests. This recipe combines affordability, versatility, and bold flavors for a crowd-pleasing dish.
- Prep Time: 15
- Cook Time: 25
- Total Time: 40 minutes
- Yield: 4 1x
Ingredients
- 2 cups cooked, shredded chicken breast
- 1/2 cup chicken ham, diced
- 1/2 cup turkey bacon, cooked and crumbled
- 1 cup shredded cheese (cheddar or Mexican blend)
- 4 large flour tortillas
- 1 small onion, finely chopped
- 1 small bell pepper, finely chopped
- 2 cloves garlic, minced
- 1/4 cup salsa or tomato sauce
- 1 tbsp olive oil or cooking spray
- 1 tsp cumin
- 1 tsp paprika
- 1 tsp chili powder
- Salt and pepper, to taste
- Sour cream, for serving
Instructions
- Preheat oven to 400°F (200°C).
- Heat olive oil in a skillet over medium heat. Sauté onions and bell peppers for 3–4 minutes until tender.
- Add garlic and cook for 30 seconds until fragrant.
- Stir in shredded chicken, diced chicken ham, and crumbled turkey bacon.
- Season with cumin, paprika, chili powder, salt, and pepper. Mix well.
- Add half the shredded cheese and salsa, stirring until combined.
- Lay a tortilla flat and spoon in filling. Fold sides and roll tightly. Repeat with remaining tortillas.
- Place chimichangas seam-side down on a baking sheet lined with parchment. Lightly brush with olive oil.
- Bake for 20–25 minutes, turning halfway, until golden brown.
- Let cool for a few minutes and serve with sour cream or salsa.
Notes
Customize with beans, corn, or jalapeños.
Use rotisserie chicken for convenience.
Can be made ahead and refrigerated or frozen.
FAQs
Q1: Can I make these chimichangas ahead of time?
Yes! You can assemble the chimichangas and store them in the refrigerator for up to 24 hours before baking. If you want to prepare them even earlier, wrap each chimichanga in plastic wrap and freeze for up to 2 months. Bake from frozen by adding 5–10 extra minutes to the cooking time.
Q2: Can I use rotisserie chicken instead of cooking chicken breast?
Absolutely! Rotisserie chicken is a convenient shortcut and adds extra flavor. Just shred it and follow the recipe as usual.
Q3: Can I make these gluten-free?
Yes. Simply substitute regular flour tortillas with gluten-free tortillas. The texture may differ slightly, but the flavor will remain delicious.
Q4: How can I make them spicier?
Add chopped jalapeños, a dash of cayenne pepper, or a spicier salsa to the filling. Adjust gradually to suit your heat preference.
Q5: Can I use low-fat cheese or other dairy alternatives?
Yes. Low-fat or plant-based cheeses melt well and keep the dish lighter while maintaining the rich flavor.
Q6: What sides go well with baked chicken chimichangas?
Serve with sour cream, guacamole, salsa, rice, or a fresh salad for a balanced meal.