
When I first made these Peanut Butter Balls with Rice Krispies, I didn’t expect them to become an instant favorite in my kitchen. I was looking for a simple treat that combined crunch, sweetness, and a little bit of nostalgia from my childhood. As soon as I mixed the peanut butter with the crispy rice cereal, I knew this recipe would be a staple for quick snacks and dessert platters alike. Rolling them into bite-sized balls made the experience even more fun—perfect for sharing with friends or enjoying solo while curled up with a cup of tea.
You will love this recipe because it is quick, fuss-free, and utterly satisfying. Each bite combines the creamy richness of peanut butter with the delicate crunch of Rice Krispies, creating a texture contrast that keeps you coming back for more. The sweetness is just right, making it a treat that doesn’t overpower your taste buds but still feels indulgent. It’s a comfort food in its simplest form, bringing warmth and joy with every bite.
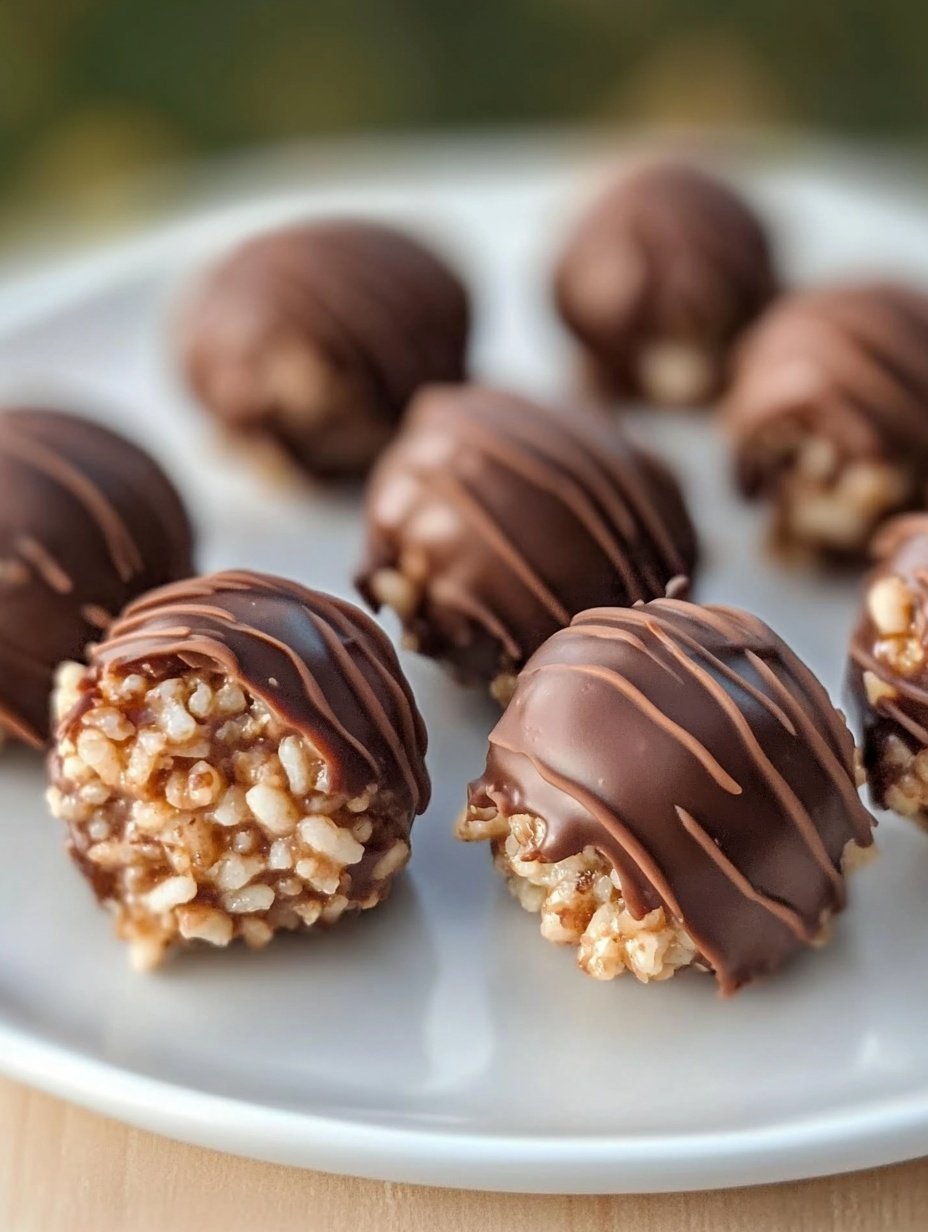
What makes these Peanut Butter Balls even more appealing is their versatility. You can enjoy them as a dessert, pack them for lunchboxes, or serve them at parties. They can be customized with chocolate coatings, sprinkles, or even a pinch of sea salt on top. Despite their elegant taste, they remain incredibly simple to prepare, making them ideal for bakers of all skill levels.
Another great aspect of this recipe is its affordability. The ingredients are basic pantry staples that don’t break the budget. Peanut butter, Rice Krispies, a touch of sugar or honey, and a few extras for coating are all you need. You won’t have to hunt for rare or expensive ingredients, making it an accessible treat for anyone.
Ingredients for Peanut Butter Balls with Rice Krispies:
-
1 cup peanut butter
-
1/2 cup honey or maple syrup
-
3 cups Rice Krispies cereal
-
1 teaspoon vanilla extract
-
1/4 teaspoon salt
-
Optional: chocolate chips or melted chocolate for coating
These simple ingredients come together to create a snack that’s crunchy, chewy, and absolutely irresistible. Once you try this recipe, I guarantee it will become a favorite in your home as it has in mine.
Preparing these Peanut Butter Balls with Rice Krispies is easier than you might think, and it’s perfect for both beginners and seasoned bakers. The key is to combine the ingredients gently to maintain the crunch of the cereal while ensuring the peanut butter mixture holds everything together.
How to Prepare This Recipe
-
Prepare the Peanut Butter Mixture:
Start by placing 1 cup of peanut butter into a medium-sized mixing bowl. Add 1/2 cup of honey or maple syrup and 1 teaspoon of vanilla extract. Mix thoroughly until the ingredients are fully combined, creating a smooth and slightly sticky mixture. Ensure there are no lumps, as a uniform texture will help the balls hold together better. -
Add Salt:
Sprinkle in 1/4 teaspoon of salt to enhance the flavors. Salt balances the sweetness of honey or maple syrup and intensifies the peanut butter taste, creating a well-rounded flavor profile. -
Incorporate Rice Krispies:
Gradually fold in 3 cups of Rice Krispies cereal. Use a spatula or wooden spoon to combine the cereal evenly with the peanut butter mixture. Be careful not to crush the cereal too much; the goal is to maintain its crisp texture for that satisfying crunch. -
Shape the Balls:
Once the mixture is fully combined, scoop out small portions using a spoon or cookie scoop. Roll each portion between your palms to form bite-sized balls. Aim for uniformity in size to ensure even coating if you plan to add chocolate or toppings. -
Optional Coating:
If desired, melt a handful of chocolate chips in a microwave-safe bowl for 20-30 seconds, stirring halfway. Dip each ball into the melted chocolate and place it on a parchment-lined tray. You can also sprinkle crushed nuts, shredded coconut, or sprinkles for added texture and visual appeal. -
Chill to Set:
Refrigerate the Peanut Butter Balls for at least 30 minutes. Chilling firms them up, making them easier to handle and enhancing the flavors as the ingredients meld together. -
Serving and Storing:
Serve immediately after chilling, or store in an airtight container in the refrigerator for up to a week. They also freeze well, making them an excellent make-ahead snack for busy days or gatherings.
Quick and Easy
This recipe is quick and easy because it requires minimal cooking, and preparation time is under 15 minutes. The step-by-step instructions are straightforward, and the mixture comes together in one bowl, reducing cleanup.
Customizable
You can customize these Peanut Butter Balls by adding different mix-ins such as mini chocolate chips, dried fruits, or a pinch of cinnamon for extra flavor. Swapping peanut butter for almond or cashew butter creates a new taste experience while keeping the method the same.
Popular with Many People
These Peanut Butter Balls are popular for all ages. Children love their sweetness and fun texture, while adults enjoy them as a wholesome treat. They are perfect for parties, school snacks, or holiday gift baskets. Their crunchy-chewy combination is a classic favorite that rarely disappoints.
By following these steps, you will achieve perfectly shaped, delicious Peanut Butter Balls with Rice Krispies every time. The recipe’s simplicity, versatility, and crowd-pleasing flavor make it a must-try for any home baker.
PrintPeanut Butter Balls with Rice Krispies

These Peanut Butter Balls with Rice Krispies are a simple, no-bake treat that combines creamy peanut butter with crunchy cereal. Perfect for snacks, desserts, or party treats, they are quick to prepare, customizable, and loved by both kids and adults.
- Prep Time: 15
- Cook Time: None
- Total Time: 0 hours
- Yield: 25 1x
Ingredients
- 1 cup peanut butter
- 1/2 cup honey or maple syrup
- 3 cups Rice Krispies cereal
- 1 teaspoon vanilla extract
- 1/4 teaspoon salt
- Optional: chocolate chips or melted chocolate for coating
Instructions
- Mix Wet Ingredients: In a medium bowl, combine 1 cup peanut butter, 1/2 cup honey or maple syrup, and 1 teaspoon vanilla extract. Stir until smooth and uniform.
- Add Salt: Sprinkle 1/4 teaspoon salt into the mixture and blend thoroughly.
- Fold in Cereal: Gradually add 3 cups Rice Krispies cereal. Gently fold with a spatula to keep the cereal crunchy and evenly coated.
- Form Balls: Scoop small portions of the mixture and roll them between your palms into bite-sized balls. Ensure even sizing for consistency.
- Optional Coating: Melt chocolate chips in a microwave-safe bowl for 20–30 seconds. Dip each ball into the melted chocolate, then place on a parchment-lined tray. Sprinkle with toppings if desired.
- Chill: Refrigerate for at least 30 minutes to firm up the balls before serving.
- Serve or Store: Serve chilled, or store in an airtight container in the refrigerator for up to one week. Freeze for longer storage if needed.
Notes
For nut-free alternatives, use sunflower seed butter.
Customize with mini chocolate chips, shredded coconut, or a dash of cinnamon.
Chilling is essential for proper texture and ease of handling.
FAQs
1. Can I use natural peanut butter?
Yes, natural peanut butter works well. It may be slightly more runny, so you might need to chill the mixture a little longer before shaping the balls.
2. Can I make these peanut butter balls nut-free?
Absolutely. Substitute peanut butter with sunflower seed butter or soy nut butter for a nut-free alternative. The texture remains similar, and the flavor is still delicious.
3. How long do Peanut Butter Balls last?
Store them in an airtight container in the refrigerator for up to one week. For longer storage, you can freeze them for up to three months. Thaw in the refrigerator before serving.
4. Can I skip the chocolate coating?
Yes, the peanut butter and Rice Krispies mixture is delicious on its own. The coating is optional and mainly adds extra flavor and visual appeal.
5. Can I make them larger or smaller?
You can adjust the size to your preference. Just keep in mind that larger balls may take longer to chill and firm up, while smaller ones are perfect for bite-sized snacking.
6. Can I add other ingredients?
Yes, you can mix in mini chocolate chips, shredded coconut, or a sprinkle of cinnamon for a personalized twist. The recipe is very versatile.
7. Do I need to bake them?
No baking is required. These are no-bake treats, which makes them quick and easy to prepare.
8. Can I make them ahead for parties?
Definitely. Make them a day in advance and refrigerate until serving. They hold up well and are perfect for gatherings.