
There’s something truly magical about the combination of chocolate and peanut butter, and for as long as I’ve been baking, I’ve had a soft spot for Reese’s. I remember the first time I had the idea to transform that small, irresistible candy into a giant, indulgent dessert. It was during a quiet afternoon when I wanted to surprise my family with something both nostalgic and over-the-top. I opened my pantry, spotted a jar of peanut butter next to a bag of chocolate chips, and the idea hit me like a lightning bolt: why not make a giant Reese’s pie? That was the beginning of a dessert that has now become a regular request at gatherings, celebrations, and honestly, even on ordinary weekends.
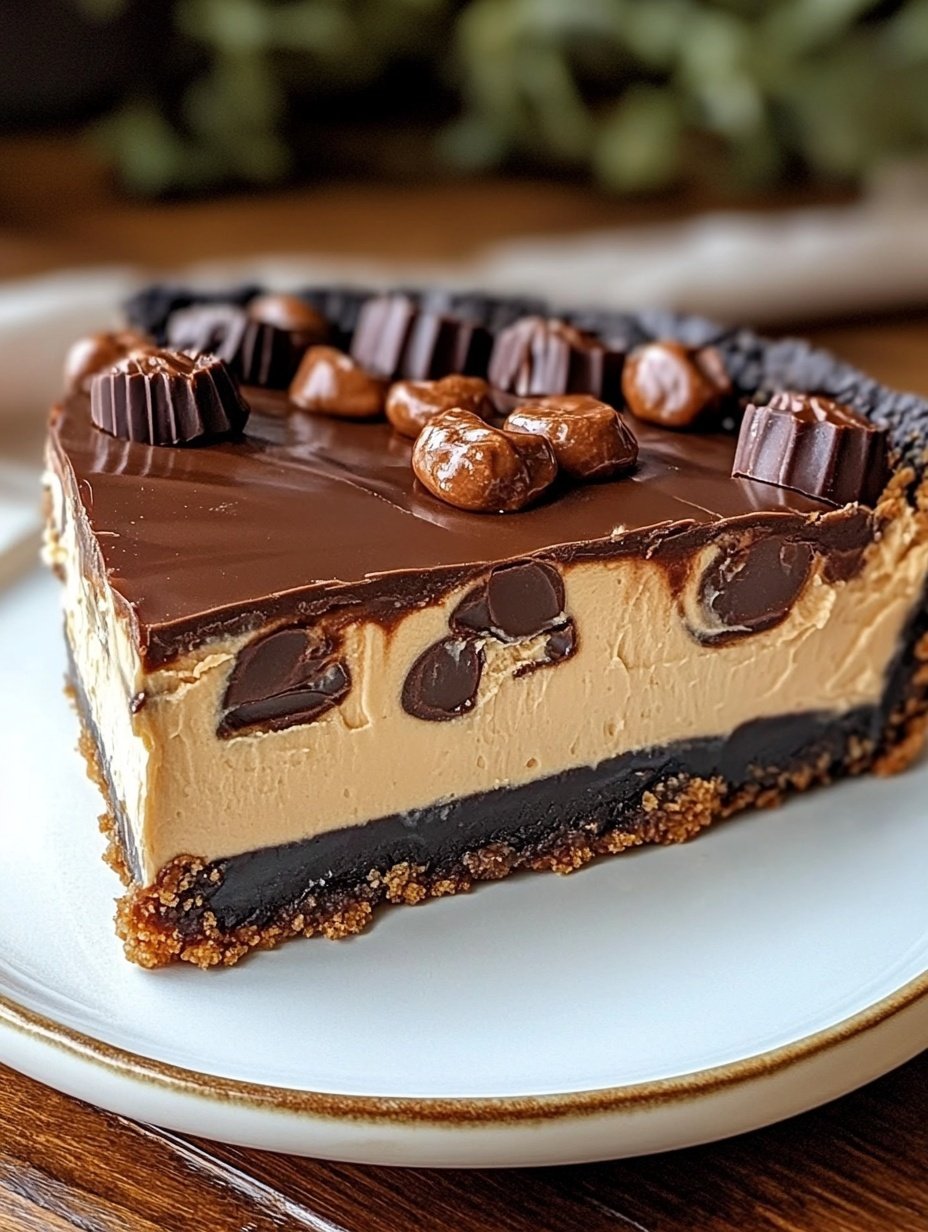
This Giant Reese’s Peanut Butter Cup Pie is everything you imagine it to be—rich, creamy, full of peanut butter goodness, and encased in a silky chocolate shell. The best part? There’s absolutely no baking involved. It’s a dessert that feels indulgent and looks impressive, yet it’s incredibly easy to make with just a handful of ingredients.
Why You Will Love This Recipe
If you love peanut butter cups, this dessert takes that love to a whole new level. The creamy filling melts in your mouth, perfectly balanced by a slightly firm, decadent chocolate base and topping. Every bite is a dream. It’s a showstopper for holidays, parties, or as a sweet treat after dinner. And because it’s no-bake, you don’t even need to turn on your oven.
Versatile
This pie can be adapted in so many ways. Want to make it mini-sized? Use small tart pans instead of one big one. Prefer a crunchier texture? Add some chopped roasted peanuts to the filling or sprinkle them on top. You can also use crunchy peanut butter for extra bite. If you need a gluten-free version, simply use gluten-free cookies for the crust.
Affordable
What’s great about this recipe is how budget-friendly it is. Most of the ingredients are pantry staples: peanut butter, chocolate, powdered sugar, and cookies for the crust. With just a few dollars, you can make a dessert that looks like it came from a bakery.
Ingredients for the Recipe:
-
Chocolate sandwich cookies (such as Oreos), crushed
-
Melted unsalted butter
-
Creamy peanut butter (or crunchy if preferred)
-
Powdered sugar
-
Unsalted butter, softened
-
Heavy cream
-
Semi-sweet or milk chocolate chips
-
A pinch of salt
-
Optional toppings: chopped peanuts, sea salt flakes, or a drizzle of melted chocolate
How to Prepare This Recipe
Making this Giant Reese’s Peanut Butter Cup Pie is surprisingly simple and straightforward. It requires no oven time, minimal equipment, and just a bit of chilling. Whether you’re an experienced baker or a total beginner, this dessert is a no-fail, crowd-pleasing treat that delivers on taste and presentation.
Step-by-Step Instructions for Preparation
1. Prepare the crust
Start by placing the chocolate sandwich cookies into a food processor. Pulse until you have fine crumbs. You can also place them in a sealed bag and crush them with a rolling pin. Transfer the crumbs into a mixing bowl and pour in the melted butter. Stir until all the crumbs are evenly moistened.
Press the mixture firmly into the bottom and up the sides of a 9-inch tart pan or deep-dish pie pan. Use the flat bottom of a measuring cup or glass to smooth it out evenly. Place the crust in the refrigerator or freezer for at least 20 minutes to set.
2. Make the peanut butter filling
In a large mixing bowl, beat the creamy peanut butter and softened unsalted butter together until smooth and creamy. Gradually add the powdered sugar and a pinch of salt, mixing until fully incorporated. The mixture will become thick. If needed, add a tablespoon of heavy cream to loosen it slightly.
Once the filling is smooth and spreadable, transfer it into the chilled crust. Use a spatula to spread the mixture evenly, smoothing out the top. Return the pie to the refrigerator while you prepare the chocolate ganache topping.
3. Prepare the chocolate topping
In a microwave-safe bowl or small saucepan, heat the heavy cream until just about to boil. If using the microwave, heat in 20-second intervals until steaming. Pour the hot cream over the chocolate chips in a heatproof bowl. Let sit for 1-2 minutes to soften the chocolate.
Stir the mixture gently until smooth and glossy. Let the ganache cool for 5 minutes, then pour it over the peanut butter filling. Tilt the pie pan to evenly distribute the chocolate, making sure it covers the entire surface.
4. Chill and serve
Refrigerate the pie for at least 2 hours, or until the ganache has fully set. For best texture and flavor, allow the pie to sit at room temperature for 10 minutes before slicing. Use a sharp knife warmed under hot water (and wiped dry) for cleaner cuts.
Quick and Easy
This recipe comes together quickly, with the longest step being the chill time. No baking, no complex techniques, and no need for special tools. It’s a great make-ahead dessert that can be whipped up in under 30 minutes, plus chill time.
Customizable
You can personalize this pie to suit your preferences. Prefer milk chocolate? Use it instead of semi-sweet. Want more texture? Add chopped chocolate or crushed pretzels to the filling. Like a hint of salt? Sprinkle sea salt flakes over the ganache for contrast. You can even swap the crust with graham crackers or digestive biscuits for a twist.
Popular With Many People
This Giant Reese’s Peanut Butter Cup Pie is a guaranteed hit with anyone who loves sweet treats. Whether served at birthday parties, potlucks, or family dinners, it disappears fast. It’s nostalgic, satisfying, and has that “wow” factor that makes people ask for seconds (and the recipe).
PrintGiant Reese’s Peanut Butter Cup Pie 🥜🍫 A Dreamy No-Bake Dessert! 😍

This no-bake Giant Reese’s Peanut Butter Cup Pie is a dreamy dessert with a rich peanut butter filling and smooth chocolate ganache topping, all nestled in a chocolate cookie crust. It’s the perfect treat for peanut butter and chocolate lovers, and it’s easy enough to make without even turning on the oven.
- Prep Time: 25
- Total Time: 25 minutes
- Yield: 12
Ingredients
- For the crust:
– 24 chocolate sandwich cookies (like Oreos), finely crushed
– 6 tablespoons unsalted butter, melted - For the peanut butter filling:
– 1 ½ cups creamy peanut butter
– ½ cup unsalted butter, softened
– 1 ½ cups powdered sugar
– ¼ teaspoon salt
– 2 tablespoons heavy cream (as needed) - For the chocolate ganache topping:
– 1 cup semi-sweet or milk chocolate chips
– ½ cup heavy cream - Optional toppings:
– Crushed peanuts
– Sea salt flakes
– Melted chocolate drizzle
Instructions
- Prepare the crust:
In a food processor, pulse the sandwich cookies until they become fine crumbs. Alternatively, place the cookies in a zip-top bag and crush with a rolling pin.
In a medium bowl, combine the crushed cookies with melted butter and stir until evenly moistened.
Press the mixture into the bottom and up the sides of a 9-inch tart or pie pan. Use a flat-bottomed cup to compact it tightly and evenly.
Chill the crust in the refrigerator for at least 20 minutes to set. - Make the peanut butter filling:
In a large mixing bowl, beat the peanut butter and softened butter together until smooth and well combined.
Gradually add powdered sugar and salt, mixing until thick and creamy.
If the filling is too stiff, mix in 1–2 tablespoons of heavy cream until it becomes spreadable.
Spoon the filling into the chilled crust and smooth it evenly with a spatula.
Return the pie to the refrigerator while preparing the topping. - Make the ganache topping:
In a small saucepan or microwave-safe container, heat the heavy cream until just about to simmer (do not boil).
Place the chocolate chips in a heatproof bowl. Pour the hot cream over the chocolate and let sit for 1–2 minutes.
Stir gently until the chocolate is melted and the mixture is smooth and glossy.
Allow it to cool slightly, then pour over the peanut butter layer.
Tilt the pan gently to spread the ganache evenly to the edges. - Chill and serve:
Place the pie in the refrigerator and chill for at least 2 hours, or until the topping is fully set.
Before serving, allow the pie to sit at room temperature for 10–15 minutes.
For cleaner slices, run a sharp knife under hot water, then dry it between cuts.
Garnish with optional toppings if desired.
Notes
Use creamy peanut butter for the smoothest texture, or crunchy for added bite.
Add crushed peanuts or crushed pretzels to the top for texture and contrast.
The pie keeps well refrigerated for up to 5 days. Cover tightly with plastic wrap.
This recipe can be made in mini tart pans for individual servings.
For variation, swirl melted peanut butter into the ganache topping before setting.
FAQs
Can I use natural peanut butter in this recipe?
Natural peanut butter is often more oily and runny, which can affect the texture of the filling. For best results, use a commercial creamy peanut butter that holds its shape better and provides a smoother, more stable filling.
What type of chocolate works best for the topping?
Semi-sweet or milk chocolate chips work well, depending on how sweet you like your pie. Dark chocolate can also be used for a richer, more intense flavor. Be sure to melt the chocolate gently with warm cream for a silky finish.
Is this pie freezer-friendly?
Yes, you can freeze the pie. Once fully set, wrap it tightly in plastic wrap and then in foil. Freeze for up to 2 months. To serve, let it thaw in the refrigerator overnight. For best texture, allow it to sit at room temperature for 10–15 minutes before slicing.
Can I make this pie in advance?
Absolutely. In fact, it’s even better when made ahead. You can prepare it a day or two in advance and store it in the refrigerator until ready to serve. Just be sure it’s covered tightly to prevent it from absorbing other fridge odors.
Can I make this recipe without a food processor?
Yes. If you don’t have a food processor, simply crush the cookies in a zip-top bag using a rolling pin or heavy object. For the filling, use a hand mixer or stand mixer to ensure smooth, creamy consistency.
What can I use if I don’t have a tart or pie pan?
You can use a springform pan or even a square baking dish lined with parchment paper. Just keep in mind that the shape will vary slightly, but the taste will remain delicious.