
I still remember the first time I tasted a Dragon Roll at a local sushi restaurant. It was one of those dishes that immediately grabbed my attention – colorful, vibrant, and layered with textures that kept me going back for more. The creamy avocado, the sweet and tangy unagi-inspired sauce, the crunch of cucumber, and the tender shrimp all created an experience that felt both indulgent and refreshing. Over time, I realized that while I loved ordering it out, I wanted to enjoy the same flavors at home in a simpler, more practical way. That’s how this Dragon Roll Sushi Bowl recipe came to life.
What makes this version so exciting is that it brings all the best parts of a traditional Dragon Roll into a bowl format. No rolling mats, no tricky techniques, just the same irresistible layers presented in a more approachable style. Each bite still gives you the harmony of rice, seafood, avocado, and sauces, but now it comes together in minutes instead of hours.
You will love this recipe because it feels like restaurant-quality sushi without the stress of making perfect rolls. It’s quick, easy, and fun to assemble, whether you’re preparing it for yourself, your family, or as a meal to impress guests. The presentation is still stunning – a colorful bowl filled with fresh, crisp vegetables and protein-rich shrimp. Plus, it’s customizable, so you can adapt it to your taste and dietary needs without losing its charm.
This sushi bowl is also very versatile. You can swap the shrimp for grilled salmon, tuna, or even crispy tofu for a vegetarian twist. You can play around with toppings like spicy mayo, sesame seeds, or fresh mango for a fruity kick. It’s the kind of recipe that encourages creativity while giving you a reliable base to start with.
Another reason I love this recipe is its affordability compared to restaurant sushi. Making it at home allows you to enjoy the same delicious flavors at a fraction of the price. Most of the ingredients are pantry staples or easy-to-find fresh produce, so you don’t have to go on a long hunt for specialty items.
Ingredients for the Dragon Roll Sushi Bowl:
-
2 cups cooked sushi rice
-
2 tablespoons rice vinegar
-
1 tablespoon sugar
-
½ teaspoon salt
-
8 large shrimp, cooked and sliced
-
1 avocado, thinly sliced
-
1 cucumber, julienned
-
1 small carrot, julienned
-
2 tablespoons mayonnaise
-
1 tablespoon sriracha
-
2 tablespoons soy sauce (or tamari for gluten-free)
-
1 tablespoon teriyaki sauce (as an alternative to eel sauce)
-
1 tablespoon sesame seeds
-
1 sheet nori, cut into thin strips
-
Optional garnish: sliced green onions or pickled ginger
How to Prepare This Recipe
Creating a Dragon Roll Sushi Bowl at home is much easier than it sounds. Instead of dealing with rolling mats and precise cutting, this recipe focuses on layering the ingredients in a bowl so that every bite delivers the same combination of textures and flavors as a restaurant-quality Dragon Roll. The steps are straightforward, and once you prepare the rice and toppings, everything comes together quickly.
Step-by-Step Instructions for Preparation
Step 1: Prepare the Sushi Rice
Start by cooking 2 cups of short-grain sushi rice according to the package instructions. Once the rice is cooked and still warm, transfer it to a large bowl. In a separate small bowl, mix rice vinegar, sugar, and salt until dissolved. Pour this mixture over the warm rice and gently fold it in with a spatula. Be careful not to mash the rice; the grains should remain fluffy and separate. Let it cool to room temperature before assembling the bowl.
Step 2: Cook the Shrimp
Bring a pot of water to a gentle boil and add a pinch of salt. Drop in the shrimp and cook them for about 2–3 minutes, just until they turn pink and opaque. Drain them and let them cool. Slice each shrimp lengthwise to create thinner pieces that are easier to layer on the rice. If you prefer, you can also grill the shrimp for a smoky flavor.
Step 3: Prepare the Vegetables
Peel and thinly slice the avocado. Next, julienne the cucumber and carrot into fine strips. Having crisp and evenly cut vegetables will give the bowl both a fresh crunch and a beautiful presentation. You can also prepare additional toppings like mango slices or thinly shredded lettuce if you want to add variety.
Step 4: Make the Sauces
In a small bowl, mix mayonnaise with sriracha to create a spicy mayo. Adjust the amount of sriracha based on your spice preference. In another small bowl, prepare your soy or tamari sauce for dipping or drizzling. For a sweet and savory glaze, use teriyaki sauce as a substitute for eel sauce. These sauces will tie the flavors together and give the bowl that signature Dragon Roll taste.
Step 5: Assemble the Sushi Bowl
Begin with a base of cooled sushi rice in each bowl. On top of the rice, arrange the cucumber and carrot strips neatly. Place avocado slices in a fan shape for visual appeal. Lay the shrimp slices across the avocado, slightly overlapping them to mimic the layered effect of a traditional Dragon Roll. Drizzle spicy mayo across the shrimp in thin zigzags, then add a drizzle of teriyaki sauce for sweetness. Sprinkle sesame seeds and nori strips on top for texture and garnish.
Step 6: Add Garnishes and Serve
To finish, sprinkle finely sliced green onions and place a small portion of pickled ginger on the side. Serve immediately so the rice remains fresh and the vegetables retain their crunch.
Quick and Easy
The beauty of this Dragon Roll Sushi Bowl is how quickly it comes together once the rice and shrimp are prepared. Unlike traditional sushi rolls, which require careful rolling and cutting, this dish is all about layering ingredients in a visually pleasing way. It saves time without sacrificing taste or presentation.
Customizable
This recipe is highly adaptable to your taste. For a vegetarian version, replace shrimp with crispy tofu or grilled mushrooms. For seafood lovers, substitute shrimp with seared salmon or tuna slices. If you enjoy extra crunch, add fried onions or tempura bits on top. You can even switch the base from sushi rice to brown rice, cauliflower rice, or quinoa for a lighter variation. The sauces can also be adjusted: make a milder mayo without sriracha, or add a touch of honey to teriyaki for extra sweetness.
Popular with Many People
This dish has universal appeal because it delivers all the flavors of sushi without requiring special tools or skills. The creamy avocado, savory shrimp, crisp vegetables, and flavorful sauces make it a crowd-pleaser for family dinners, gatherings with friends, or even meal prep for the week. Children love the mild, colorful presentation, while adults appreciate the balanced taste and freshness. It’s a recipe that always feels like a treat, even though it’s simple to prepare.
PrintDragon Roll Sushi Bowl

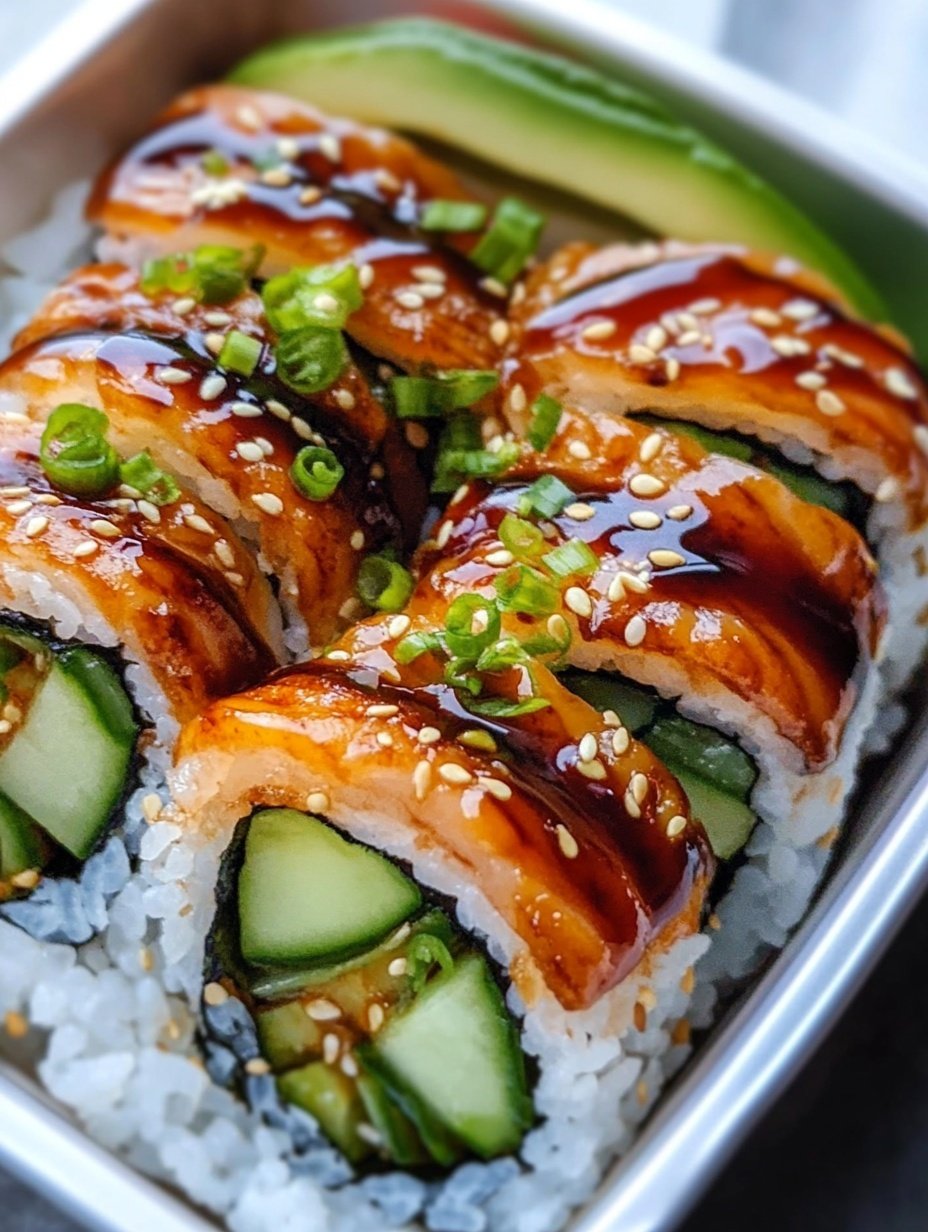
This Dragon Roll Sushi Bowl captures the flavors of a classic sushi roll in a simple and approachable way. With layers of sushi rice, shrimp, avocado, and vegetables, it delivers freshness and balance in every bite. The sauces tie everything together, making it taste like restaurant-style sushi with half the effort.
- Prep Time: 20
- Cook Time: 10
- Total Time: 30 minutes
- Yield: 2 1x
Ingredients
- 2 cups cooked sushi rice
- 2 tablespoons rice vinegar
- 1 tablespoon sugar
- ½ teaspoon salt
- 8 large shrimp, cooked and sliced
- 1 avocado, thinly sliced
- 1 cucumber, julienned
- 1 small carrot, julienned
- 2 tablespoons mayonnaise
- 1 tablespoon sriracha
- 2 tablespoons soy sauce (or tamari for gluten-free)
- 1 tablespoon teriyaki sauce
- 1 tablespoon sesame seeds
- 1 sheet nori, cut into thin strips
- Optional garnish: sliced green onions or pickled ginger
Instructions
- Cook the sushi rice according to package directions. While still warm, season with rice vinegar, sugar, and salt. Fold gently until combined and let cool to room temperature.
- Bring a pot of salted water to a gentle boil. Add the shrimp and cook for 2–3 minutes, until pink and opaque. Drain, cool, and slice lengthwise.
- Slice the avocado into thin strips. Julienne the cucumber and carrot. Prepare optional garnishes such as green onions or pickled ginger.
- In a small bowl, mix mayonnaise with sriracha to create spicy mayo. In another small bowl, set aside soy or tamari sauce. Use teriyaki sauce as a glaze for sweetness.
- Place the cooled sushi rice at the bottom of serving bowls. Layer cucumber and carrot evenly over the rice. Arrange avocado slices in a fan shape. Lay sliced shrimp over the avocado.
- Drizzle spicy mayo across the shrimp. Add a light drizzle of teriyaki sauce. Sprinkle sesame seeds and shredded nori strips on top.
- Garnish with green onions and a side of pickled ginger. Serve immediately.
Notes
Keep rice at room temperature for the best texture.
Adjust sauce quantities to suit your taste.
For a vegetarian option, replace shrimp with tofu or mushrooms.
FAQs
Can I make the sushi rice ahead of time?
Yes, you can cook the sushi rice in advance. Store it in an airtight container at room temperature for up to six hours. Avoid refrigerating it, as cold rice becomes hard and loses its sticky texture.
What protein can I use instead of shrimp?
You can swap shrimp with grilled salmon, seared tuna, or even baked chicken for a non-seafood option. For a vegetarian bowl, crispy tofu or marinated mushrooms are excellent choices.
Do I need a sushi mat to make this recipe?
No, that’s the beauty of the sushi bowl method. You get all the flavors of a Dragon Roll without needing to roll or slice sushi. Everything is layered directly into a bowl.
How spicy is the sauce?
The spicy mayo has a gentle heat that most people enjoy. You can increase or reduce the sriracha depending on your spice tolerance.
Can I prepare this recipe for meal prep?
Yes, but keep components separate. Store the rice, vegetables, and shrimp in different containers. Assemble the bowl just before serving to keep everything fresh and crisp.