
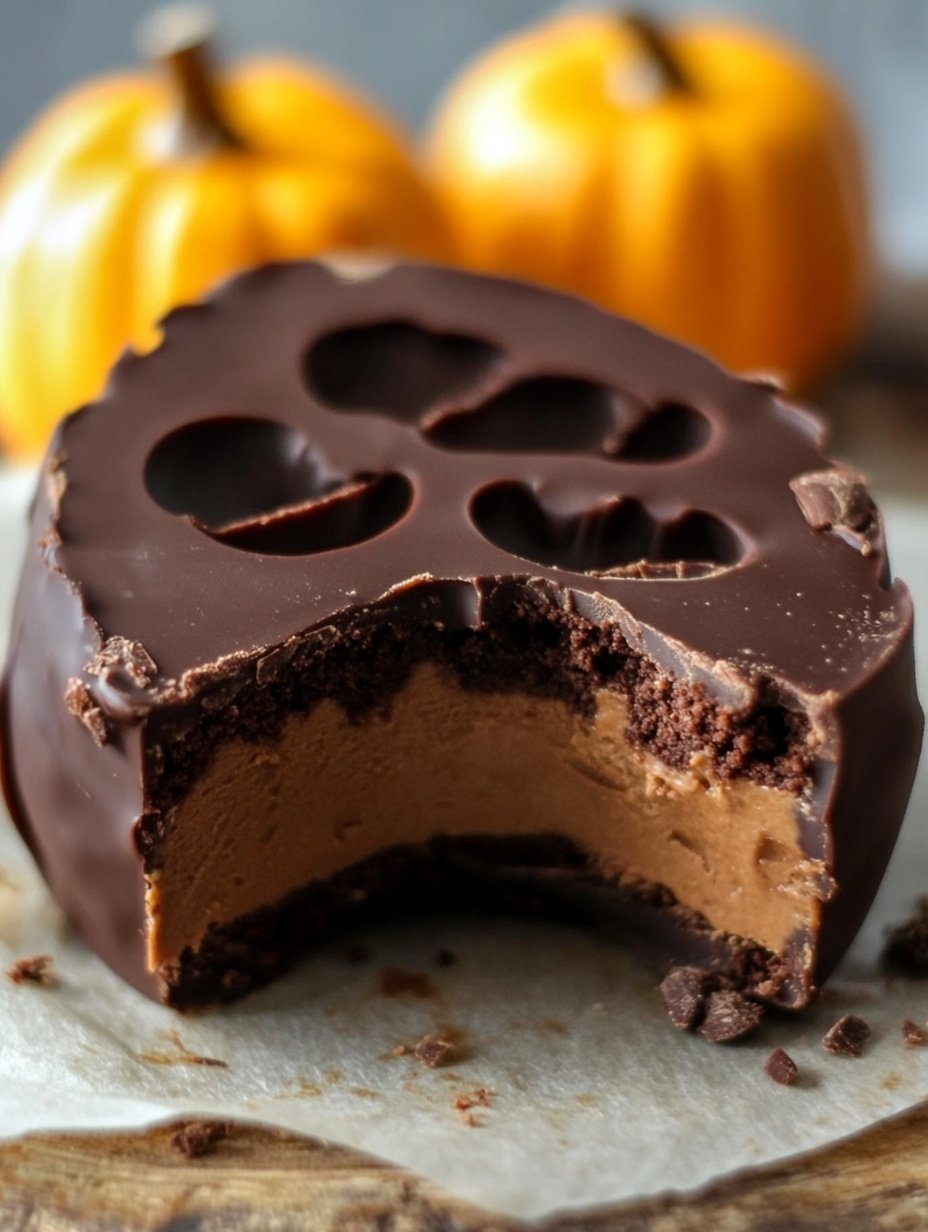
I remember the first time I made these Chocolate Peanut Butter Pumpkins—it was right at the start of fall, and the crisp air made my kitchen feel extra cozy. I wanted to create a treat that captured the warmth of the season while being fun, delicious, and perfect for sharing. The combination of rich chocolate and creamy peanut butter immediately became a family favorite, and seeing the pumpkins come together was almost as satisfying as tasting them. Each one is a small, handcrafted piece of joy, perfect for parties, gifts, or simply enjoying with a cup of tea.
You will love this recipe because it combines two of the most irresistible flavors—chocolate and peanut butter—into a visually delightful, bite-sized pumpkin treat. They are sweet yet balanced, making them a snack that appeals to both kids and adults. Beyond the flavor, they are versatile: you can serve them at Halloween parties, Thanksgiving gatherings, or just as an everyday indulgence.
These Chocolate Peanut Butter Pumpkins are also surprisingly affordable. With simple pantry staples like peanut butter, chocolate, and powdered sugar, you can create dozens of these treats without spending a fortune. Plus, they are simple enough that even beginners in the kitchen can make them look impressive.
The ingredients are straightforward and easy to find:
-
1 cup creamy peanut butter
-
1/4 cup unsalted butter, softened
-
2 cups powdered sugar
-
1 teaspoon vanilla extract
-
12 ounces semisweet chocolate, melted
-
12 pretzel sticks (for pumpkin stems)
Whether you are a seasoned baker or just starting out, these pumpkins offer an opportunity to experiment with flavor and presentation. You can adjust the sweetness or swap chocolate types depending on your taste, and the end result is always festive and crowd-pleasing. They also make wonderful edible gifts because of their charm and portability.
These little pumpkins are more than just a dessert—they are a celebration of the season, a conversation starter, and a way to bring a touch of creativity to your kitchen. Every bite delivers the perfect balance of rich chocolate and creamy peanut butter, leaving a smile on your face and a desire for just one more.
How to Prepare Chocolate Peanut Butter Pumpkins
Preparing these Chocolate Peanut Butter Pumpkins is a fun and straightforward process. With clear steps and simple ingredients, you can create a batch of festive treats that look as good as they taste.
Step-by-Step Instructions for Preparation
-
Mix the filling: In a large mixing bowl, combine 1 cup of creamy peanut butter with 1/4 cup of softened unsalted butter. Use a hand mixer or spatula to blend until smooth and creamy.
-
Add sweetness: Gradually add 2 cups of powdered sugar, mixing well after each addition. Then stir in 1 teaspoon of vanilla extract. The mixture should be firm enough to hold its shape but soft enough to mold easily.
-
Shape the pumpkins: Scoop small portions of the peanut butter mixture and roll them into balls using your hands. Then gently shape each ball into a slightly flattened pumpkin shape, pressing lightly at the top and bottom.
-
Insert the stems: Break pretzel sticks into smaller pieces and insert one into the top of each pumpkin. This creates the pumpkin stem and adds a charming touch.
-
Melt the chocolate: Place 12 ounces of semisweet chocolate in a microwave-safe bowl. Heat in 30-second intervals, stirring after each, until fully melted and smooth.
-
Coat the pumpkins: Using a fork or skewer, dip each peanut butter pumpkin into the melted chocolate, ensuring it is fully coated. Allow excess chocolate to drip off before placing the pumpkins on parchment-lined baking sheets.
-
Add finishing touches: If desired, use a small fork or toothpick to gently create pumpkin ridges in the chocolate before it sets. This enhances the pumpkin look and makes each treat more realistic.
-
Set and chill: Allow the chocolate coating to harden at room temperature or place the baking sheet in the refrigerator for 15–20 minutes. Once set, the pumpkins are ready to serve.
Quick and Easy Tips
-
Make sure your peanut butter mixture is firm enough; otherwise, the pumpkins may lose their shape when dipped in chocolate.
-
Use a microwave or double boiler to melt chocolate smoothly without burning.
-
Line your baking sheets with parchment paper to prevent sticking and make cleanup easier.
Customizable Options
-
Swap semisweet chocolate with milk or dark chocolate depending on your preference.
-
Add a pinch of sea salt to the peanut butter mixture for a sweet-salty twist.
-
Use mini chocolate chips or sprinkles on top for extra decoration.
Popular with Everyone
These Chocolate Peanut Butter Pumpkins are a hit at parties, school events, and family gatherings. Kids love shaping and dipping the pumpkins, while adults appreciate the rich chocolate and creamy peanut butter combination. They are perfect for gifting, sharing, or simply enjoying as a seasonal treat.
PrintChocolate Peanut Butter Pumpkins
These Chocolate Peanut Butter Pumpkins are a delightful seasonal treat, combining rich chocolate and creamy peanut butter in a fun pumpkin shape. Perfect for fall celebrations, they are easy to make, affordable, and customizable.
- Prep Time: 25
- Total Time: 25 minutes
- Yield: 12 1x
Ingredients
- 1 cup creamy peanut butter
- 1/4 cup unsalted butter, softened
- 2 cups powdered sugar
- 1 teaspoon vanilla extract
- 12 ounces semisweet chocolate, melted
- 12 pretzel sticks (for pumpkin stems)
Instructions
- In a large bowl, blend 1 cup peanut butter with 1/4 cup softened butter until smooth.
- Gradually add 2 cups powdered sugar, mixing after each addition. Stir in 1 teaspoon vanilla extract.
- Scoop small portions of the mixture and roll into balls. Flatten slightly and shape into pumpkin forms.
- Break pretzel sticks into smaller pieces and insert one into the top of each pumpkin for the stem.
- Melt 12 ounces of semisweet chocolate in the microwave, stirring every 30 seconds until smooth.
- Dip each pumpkin into melted chocolate using a fork or skewer, letting excess chocolate drip off. Place on parchment-lined baking sheets.
- Optionally, use a fork or toothpick to create pumpkin ridges in the chocolate before it sets.
- Allow chocolate to harden at room temperature or refrigerate for 15–20 minutes until firm.
- Serve immediately or store in an airtight container.
Notes
Ensure the peanut butter mixture is firm enough for shaping; adjust powdered sugar if too soft.
Use parchment paper to prevent sticking.
Customize by using different chocolate types or adding decorative touches.
FAQs
Q: Can I make these pumpkins ahead of time?
A: Yes, you can prepare the peanut butter mixture and shape the pumpkins a day in advance. Store them in an airtight container in the refrigerator, then dip in chocolate just before serving.
Q: Can I use crunchy peanut butter instead of creamy?
A: Creamy peanut butter is recommended for smooth shaping, but crunchy peanut butter can be used for added texture. Just note that the pumpkins may be slightly more difficult to shape.
Q: How should I store these pumpkins?
A: Keep them in an airtight container at room temperature for up to three days. For longer storage, refrigerate for up to a week.
Q: Can I freeze Chocolate Peanut Butter Pumpkins?
A: Yes, place them on a baking sheet in the freezer until firm, then transfer to an airtight container or freezer bag. They can be frozen for up to a month. Thaw in the refrigerator before serving.
Q: Can I make these nut-free?
A: You can substitute peanut butter with a seed butter, such as sunflower seed butter, to make a nut-free version. Ensure the flavor is to your liking before shaping and coating in chocolate.
Q: Can I decorate the pumpkins differently?
A: Absolutely. You can drizzle with white chocolate, sprinkle with colored sugar, or use edible markers to add faces or designs.
Q: What size should the pumpkins be?
A: Each pumpkin should be roughly 1.5 inches in diameter for easy handling and even chocolate coating. You can adjust size as needed, but keep in mind that smaller pumpkins may be trickier to coat.