
I’ve made countless desserts over the years, but there’s something about the combination of rich, fudgy brownies and airy chocolate mousse that keeps me coming back to this one. The first time I made these Chocolate Mousse Brownies was for a family gathering. I needed a dessert that felt indulgent without requiring hours of decorating. As soon as I served them, they were gone in minutes. I can still remember my niece asking if there were any extras she could take home. That was my sign that this recipe had something special.
What makes these brownies stand out is the perfect contrast between the dense, chocolatey base and the light, creamy mousse topping. It’s a bite of heaven in every square. The mousse adds a cool, silky layer that balances the intensity of the brownie. Whether you’re baking for a dinner party, a weekend treat, or even a holiday table, these brownies will become a go-to recipe. They look fancy, but they’re surprisingly simple to prepare.
Why You Will Love This Recipe
These Chocolate Mousse Brownies are a treat for all seasons. They’re elegant enough for special occasions and easy enough for a weekday dessert. Each layer complements the other: the chewy base holds up the mousse perfectly, and every bite melts in your mouth. Whether you serve them chilled for a summer dessert or at room temperature for a cozy winter gathering, they deliver the same indulgent experience.
Versatile
You can make these in a classic 9×13-inch pan, but they’re also great as individual portions for parties or bake sales. Want to switch things up? Add a hint of espresso to the brownie batter for a mocha twist or a splash of orange extract in the mousse for a citrusy touch. You can even top them with shaved chocolate, fresh berries, or a dusting of cocoa powder to match your style or the season.
Affordable
Despite their luxurious taste and appearance, these brownies won’t break the bank. You’ll find most of the ingredients already in your pantry. A few staples—like chocolate chips, heavy cream, and eggs—turn into a dessert that looks like it came from a high-end bakery. It’s an impressive dessert without the gourmet price tag.
Ingredients for the Recipe
-
Unsalted butter
-
Semi-sweet chocolate chips
-
Granulated sugar
-
Brown sugar
-
Eggs
-
Vanilla extract
-
All-purpose flour
-
Cocoa powder
-
Salt
-
Heavy whipping cream
-
Powdered sugar
-
Dark chocolate or milk chocolate (for the mousse)
How to Prepare This Recipe
Preparing these Chocolate Mousse Brownies is a two-step process—making the rich brownie base first, then layering it with a fluffy chocolate mousse once cooled. Each layer comes together with ease, and the end result is a beautifully structured, decadent dessert that looks like it took much more effort than it really did. If you’re short on time, you can make the brownie layer a day in advance and finish the mousse topping the next day. Let’s walk through the process, step by step.
Step-by-Step Instructions for Preparation
Step 1: Prepare the Brownie Layer
-
Preheat your oven to 175°C (350°F). Line a 9×13-inch baking pan with parchment paper, leaving an overhang for easy removal.
-
In a saucepan over low heat, melt the butter and semi-sweet chocolate chips, stirring until smooth. Remove from heat and let it cool slightly.
-
Whisk in the granulated sugar and brown sugar until combined.
-
Add eggs, one at a time, whisking well after each addition. Stir in the vanilla extract.
-
In a separate bowl, sift together the flour, cocoa powder, and salt. Gradually fold the dry ingredients into the wet mixture until fully incorporated.
-
Pour the brownie batter into the prepared pan and spread it evenly.
-
Bake for 25–30 minutes, or until a toothpick inserted in the center comes out with a few moist crumbs.
-
Let the brownies cool completely in the pan before adding the mousse layer.
Step 2: Prepare the Chocolate Mousse
-
In a heatproof bowl, melt the chocolate (dark or milk, based on your preference) over a double boiler or in short bursts in the microwave. Stir until smooth and set aside to cool slightly.
-
In a separate bowl, use a hand mixer or stand mixer to beat the heavy whipping cream until it starts to thicken.
-
Add the powdered sugar gradually and continue whipping until stiff peaks form.
-
Gently fold the cooled melted chocolate into the whipped cream mixture using a spatula. Do this slowly to maintain the airy texture of the mousse.
-
Spread the mousse evenly over the cooled brownie base.
-
Chill the assembled brownies in the refrigerator for at least 2–3 hours, or until the mousse is firm.
-
Once set, lift the brownies out using the parchment overhang and slice into squares with a warm, sharp knife.
Quick and Easy
Even though these brownies look like something out of a gourmet bakery window, the process is surprisingly straightforward. Each component requires just a few simple steps and common ingredients. If you’re in a pinch, you can even prepare the brownie base the night before and finish the mousse layer the next day without sacrificing flavor or texture.
Customizable
This recipe invites you to make it your own. Want an extra crunch? Add a layer of crushed nuts between the brownie and mousse. Prefer a lighter topping? Swap out the chocolate in the mousse for white chocolate or a flavored version. You can even infuse the mousse with natural flavors like peppermint or raspberry by adding extracts during the mixing process. There’s a lot of room for creativity here.
Popular With Many People
Whenever I bring these brownies to a potluck or serve them at events, they’re always the first dessert to disappear. The classic combination of fudgy chocolate and creamy mousse is a universal favorite. Adults and kids alike are drawn to the clean layers and intense flavor. It’s the kind of dessert that gets people asking for the recipe—and seconds. If you’re looking for a reliable crowd-pleaser, this one won’t disappoint.
PrintChocolate Mousse Brownies: Creamy Layers With Decadent Flavor

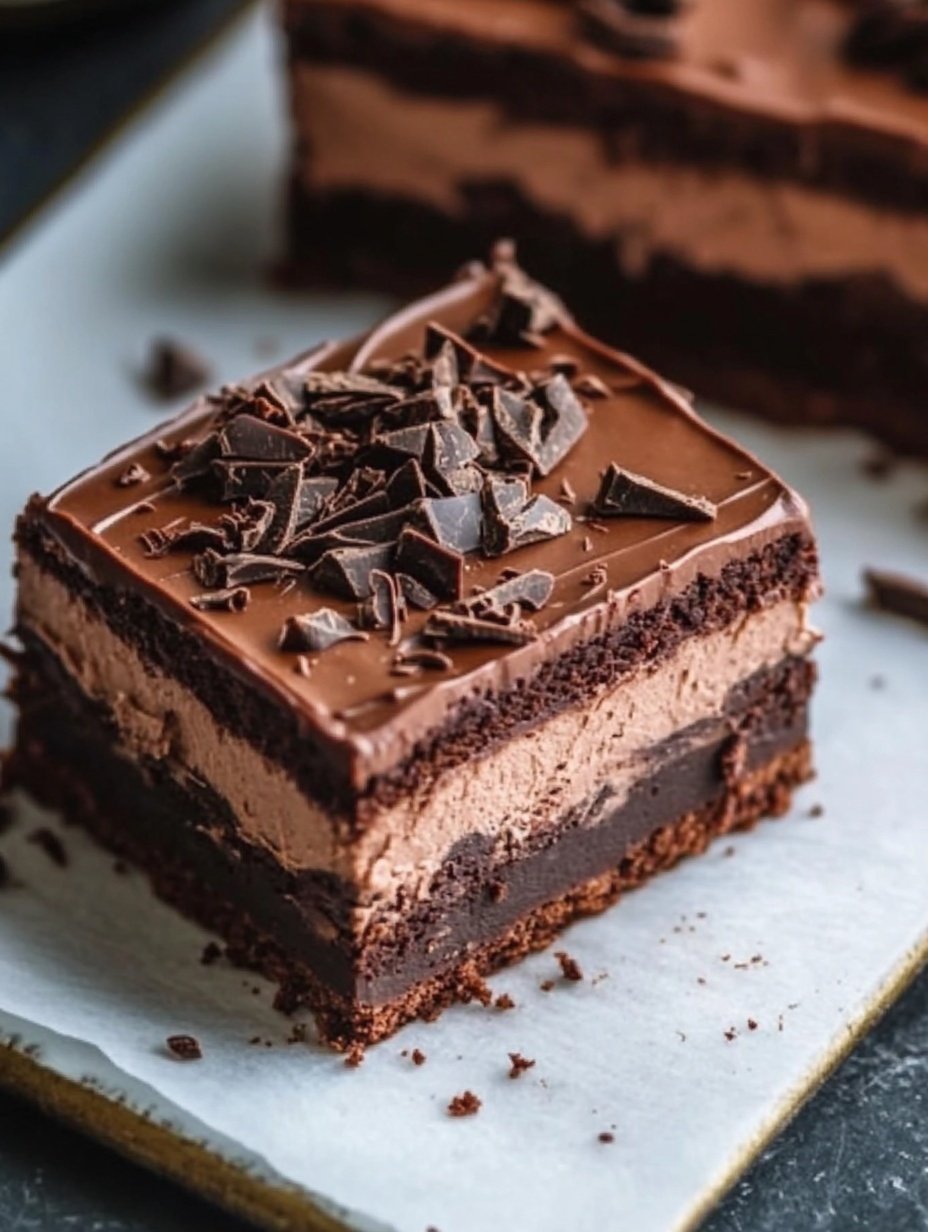
These Chocolate Mousse Brownies feature a dense, fudgy brownie base topped with a silky, rich chocolate mousse. The layers contrast beautifully in texture and taste, creating an indulgent dessert perfect for celebrations or any time you’re craving something extra decadent.
- Prep Time: 25
- Cook Time: 30
- Total Time: 55 minutes
- Yield: 16 1x
Ingredients
For the Brownie Layer:
- 1 cup unsalted butter
- 1 ½ cups semi-sweet chocolate chips
- 1 cup granulated sugar
- ½ cup brown sugar
- 4 large eggs
- 2 teaspoons vanilla extract
- 1 cup all-purpose flour
- ⅓ cup cocoa powder
- ½ teaspoon salt
For the Chocolate Mousse Layer:
- 1 ½ cups heavy whipping cream
- ⅓ cup powdered sugar
- 1 ¼ cups chopped dark chocolate or milk chocolate (your choice)
Instructions
- Preheat and Prep Pan:
Preheat your oven to 175°C (350°F). Line a 9×13-inch pan with parchment paper, leaving extra on the sides for easy lifting. - Melt Butter and Chocolate:
In a saucepan over low heat, melt the butter and semi-sweet chocolate chips. Stir continuously until smooth. Remove from heat and let it cool for 5 minutes. - Combine Wet Ingredients:
Whisk in the granulated sugar and brown sugar until well blended. Add the eggs one at a time, whisking after each. Stir in vanilla extract. - Add Dry Ingredients:
In a separate bowl, sift the flour, cocoa powder, and salt. Fold into the wet mixture gradually, mixing just until no flour streaks remain. - Bake the Brownie Layer:
Pour the batter into the prepared pan and spread evenly. Bake for 25–30 minutes or until a toothpick inserted comes out with a few moist crumbs. Cool completely in the pan. - Make the Chocolate Mousse:
Melt the dark or milk chocolate using a double boiler or microwave. Let it cool slightly. In another bowl, beat the heavy cream until it thickens. Add powdered sugar and beat until stiff peaks form. - Combine and Layer:
Gently fold the melted chocolate into the whipped cream until fully combined and airy. Spread the mousse evenly over the cooled brownie layer. - Chill and Slice:
Refrigerate for 2–3 hours or until the mousse is firm. Use the parchment to lift the brownies from the pan. Slice with a hot knife for clean edges.
Notes
Brownie base can be made a day in advance.
For a mocha twist, add 1 teaspoon instant espresso to the brownie batter.
Top with chocolate shavings, fresh raspberries, or cocoa powder for decoration.
FAQs
Can I make these brownies ahead of time?
Yes, you can prepare the brownie base a day in advance. Once fully cooled, cover it tightly and refrigerate. The mousse layer can be added the next day, followed by an additional chill time to set before serving. You can also make the entire dessert ahead and keep it refrigerated for up to 3 days.
Do I have to use heavy cream for the mousse?
Heavy whipping cream is essential for the mousse to achieve the right structure and texture. Lighter alternatives like half-and-half or milk won’t whip properly and won’t hold the mousse layer. Stick with full-fat heavy cream for best results.
Can I use milk chocolate instead of dark chocolate?
Yes, you can absolutely use milk chocolate if you prefer a sweeter mousse. Just be sure to melt it gently and cool it slightly before folding it into the whipped cream. Both dark and milk chocolate work well and offer different flavor profiles.
How do I cut clean slices without smudging the mousse?
For neat slices, use a sharp knife dipped in hot water and wiped dry before each cut. This helps the blade glide through the layers without dragging the mousse. Always slice while the dessert is well chilled.
Can I freeze Chocolate Mousse Brownies?
Yes, they freeze well. Place the sliced brownies on a tray to freeze individually, then transfer them to an airtight container. Freeze for up to 1 month. Thaw in the refrigerator before serving.
What can I use instead of chocolate chips?
You can substitute chopped baking chocolate or chocolate bars. Just be sure to use high-quality chocolate for a smooth melt and rich flavor. Avoid candy melts or compound chocolate, as they won’t offer the same taste or texture.