
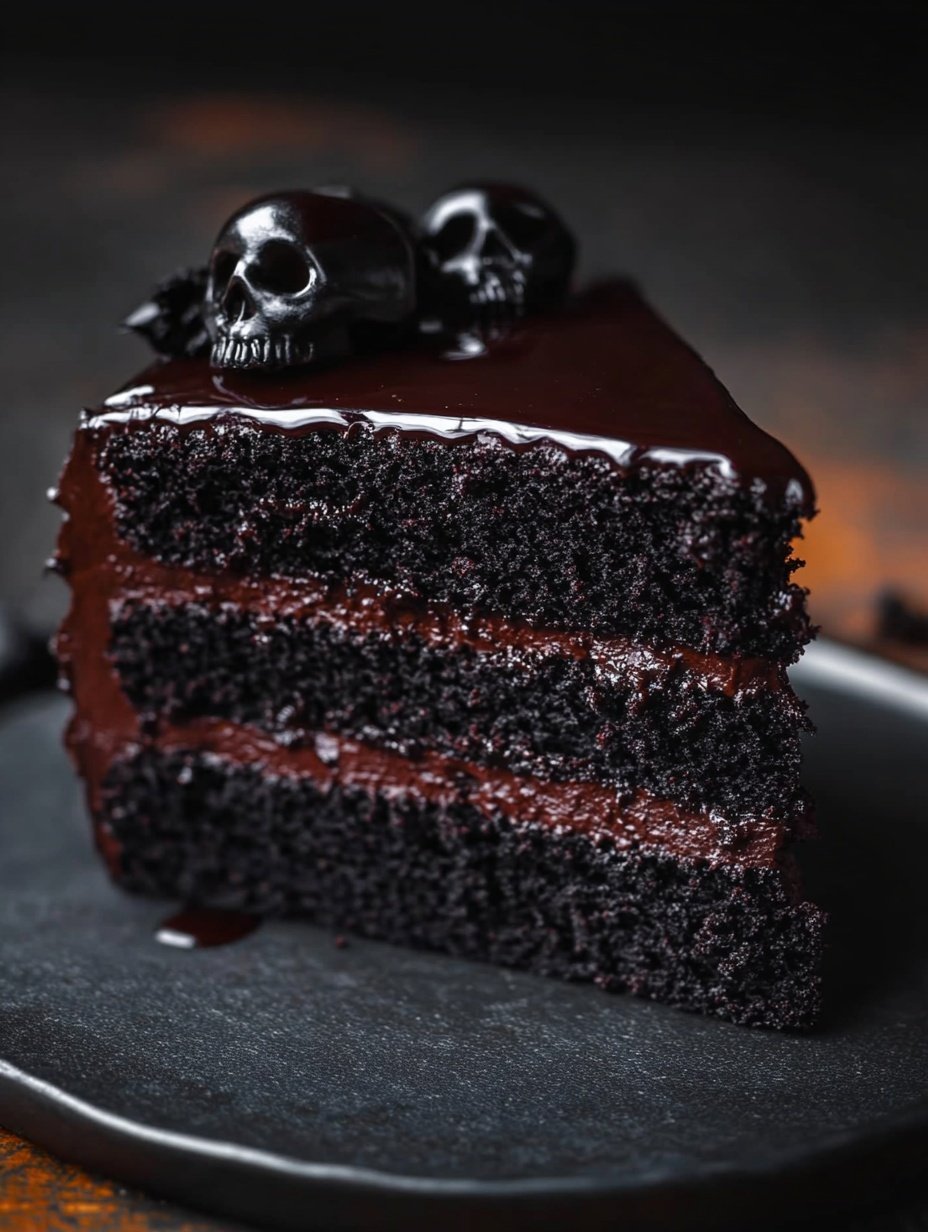
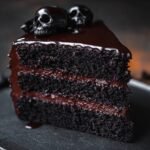
When I first started experimenting with Halloween desserts, I wanted something that would stand out both in flavor and presentation—something bold, dramatic, and irresistibly rich. That’s how this Black Velvet Halloween Cake came to life. Inspired by the classic red velvet but given a spooky seasonal twist, this cake combines deep chocolate flavor with a striking jet-black crumb and a vivid, hauntingly beautiful contrast of frosting. It’s now become a staple in my October baking, one that friends and family eagerly request each year.
This recipe captures everything I love about holiday baking: the fun of creativity, the thrill of bold visuals, and the warmth of sharing a slice with loved ones. It’s not just a cake—it’s a showstopper for any Halloween gathering.
Why You Will Love This Recipe
You’ll love this Black Velvet Halloween Cake for its dramatic appearance and decadently moist texture. The rich cocoa base gives it an intense flavor, while the silky frosting provides balance and elegance. This cake is festive, visually striking, and perfect for anyone looking to make a statement at a Halloween party or themed celebration.
It slices beautifully and holds up well, making it easy to serve. Plus, it tastes as good as it looks—if not better.
Versatile
This cake is perfect for Halloween, but with a few simple changes to the frosting colors or decorations, you can transform it for other occasions. Swap orange for red and use it as a gothic wedding cake or a bold birthday dessert. It pairs well with various fillings, from cream cheese to ganache, and can be baked as a layer cake, cupcakes, or even a bundt.
Affordable
Even though it looks like something you’d find in a boutique bakery, this recipe uses everyday pantry staples. With ingredients like flour, cocoa powder, sugar, and buttermilk, it’s budget-friendly and doesn’t require expensive tools or rare components.
You won’t need to spend a fortune to create something impressive. Most ingredients are likely already in your kitchen.
Ingredients for the Recipe
-
All-purpose flour
-
Unsweetened cocoa powder (Dutch-processed for deeper color)
-
Baking powder
-
Baking soda
-
Salt
-
Granulated sugar
-
Large eggs
-
Buttermilk
-
Vegetable oil
-
White vinegar
-
Vanilla extract
-
Black gel food coloring
-
Cream cheese
-
Unsalted butter
-
Powdered sugar
-
Orange gel food coloring (optional for frosting)
How to Prepare This Recipe
Creating this Black Velvet Halloween Cake is easier than it looks. The steps are simple, the ingredients are common, and the result is spectacular. Even if you’re new to baking, you’ll find the process straightforward and enjoyable. With a little attention to detail and the right tools, you’ll have a moist, flavorful cake with a rich, black crumb and a dramatic finish.
Step-by-Step Instructions for Preparation
Step 1: Preheat and Prepare
Begin by preheating your oven to 175°C (350°F). Grease and line three 8-inch round cake pans with parchment paper. This ensures the cakes release cleanly without breaking.
Step 2: Sift the Dry Ingredients
In a large mixing bowl, sift together 2½ cups of all-purpose flour, ½ cup of Dutch-processed cocoa powder, 2 teaspoons of baking powder, 1 teaspoon of baking soda, and ½ teaspoon of salt. Sifting helps prevent lumps and guarantees an even texture.
Step 3: Mix the Wet Ingredients
In another bowl, whisk together 1¾ cups of granulated sugar, 3 large eggs, 1 cup of buttermilk, 1 cup of vegetable oil, 1 tablespoon of white vinegar, and 2 teaspoons of vanilla extract. Blend until smooth. Then add black gel food coloring—start with 2 teaspoons and adjust to achieve a deep, rich black. Stir until fully incorporated.
Step 4: Combine Wet and Dry Mixtures
Gradually add the dry ingredients into the wet mixture. Mix on medium speed using a hand or stand mixer until just combined. Do not overmix, as this could make the cake dense. The batter should be dark, smooth, and pourable.
Step 5: Divide and Bake
Pour the batter evenly into the prepared cake pans. Use a kitchen scale for accuracy if you want perfectly even layers. Bake in the preheated oven for 25–30 minutes or until a toothpick inserted in the center comes out clean. Do not overbake.
Step 6: Cool the Cakes
Once baked, remove the pans from the oven and let the cakes cool in the pans for 10 minutes. Then transfer the cakes to a wire rack and allow them to cool completely before frosting.
Step 7: Make the Frosting
To make the frosting, beat 225g of cream cheese and ½ cup (1 stick) of unsalted butter until creamy and smooth. Gradually add 4 cups of powdered sugar and 1 teaspoon of vanilla extract. Beat until fluffy. For a Halloween twist, add orange gel food coloring to the frosting and mix until evenly tinted.
Step 8: Assemble the Cake
Place the first cake layer on a serving plate or cake board. Spread a generous layer of frosting on top. Repeat with the second and third layers. Once all layers are stacked, apply a thin crumb coat and refrigerate the cake for 20 minutes. This helps seal in the crumbs.
Step 9: Final Frosting Layer
Apply a thick, even layer of frosting around the cake. Smooth with an offset spatula or cake scraper. Use decorative piping, sprinkles, or candy eyeballs for a festive finish. You can also drizzle with dark chocolate ganache or add Halloween toppers.
Quick and Easy
Despite its striking look, this cake requires no complicated techniques. The batter comes together in one bowl, and the frosting can be made in minutes. It’s the kind of dessert you can whip up in a few hours and still impress a crowd.
Customizable
This recipe can be tailored to suit any event. Switch the colors of the frosting to match a different theme or holiday. Use flavored extracts like almond or orange for added depth. Fill the cake with raspberry jam, chocolate ganache, or cream cheese mousse to enhance the flavor profile.
If you prefer cupcakes, simply divide the batter into cupcake liners and reduce the baking time to 18–20 minutes. The recipe also works well as a sheet cake for casual gatherings or school events.
Popular With Many People
This Black Velvet Halloween Cake is always a hit. Children love its mysterious color and fun decorations, while adults appreciate the deep chocolate flavor and velvety crumb. It’s not overly sweet, making it enjoyable for a wide range of palates. It’s festive, flavorful, and perfect for sharing.
Whether you’re hosting a party, baking for coworkers, or preparing something special for family, this cake offers the ideal balance of spooky charm and classic taste. Once you try it, you’ll want to make it a yearly tradition.
PrintBlack Velvet Halloween Cake – The Epicurean Mouse | Recipe | Sweet recipes, Halloween cakes, Baking
This Black Velvet Halloween Cake is a stunning and festive dessert perfect for spooky season gatherings. With a rich, deep chocolate flavor and a bold black crumb, this cake is balanced by a smooth, fluffy cream cheese frosting tinted in Halloween hues. It’s easy to make, customizable, and guaranteed to impress.
- Prep Time: 25
- Cook Time: 30
- Total Time: 55 minutes
- Yield: 14 1x
Ingredients
For the Cake:
- 2½ cups all-purpose flour
- ½ cup Dutch-processed cocoa powder
- 2 tsp baking powder
- 1 tsp baking soda
- ½ tsp salt
- 1¾ cups granulated sugar
- 3 large eggs
- 1 cup buttermilk
- 1 cup vegetable oil
- 1 tbsp white vinegar
- 2 tsp vanilla extract
- 2–3 tsp black gel food coloring
For the Frosting:
- 225g cream cheese, softened
- ½ cup unsalted butter, softened
- 4 cups powdered sugar
- 1 tsp vanilla extract
- Orange gel food coloring (optional)
Instructions
- Preheat your oven to 175°C (350°F). Grease and line three 8-inch round cake pans with parchment paper.
- In a large bowl, sift together flour, cocoa powder, baking powder, baking soda, and salt. Set aside.
- In a separate bowl, whisk sugar, eggs, buttermilk, vegetable oil, vinegar, and vanilla extract until smooth. Add black gel food coloring and mix until fully combined.
- Gradually add the dry mixture into the wet ingredients. Mix on medium speed until just combined. Do not overmix.
- Divide the batter evenly into the prepared pans. Bake for 25–30 minutes or until a toothpick inserted into the center comes out clean.
- Allow cakes to cool in the pans for 10 minutes. Transfer them to a wire rack to cool completely before frosting.
- To make the frosting, beat cream cheese and butter until smooth. Gradually add powdered sugar and vanilla extract. Beat until fluffy. If desired, mix in orange gel coloring for a Halloween look.
- Level the cooled cake layers if needed. Place the first layer on a cake board. Spread a generous amount of frosting over it. Repeat with the remaining layers.
- Apply a crumb coat and chill the cake for 20 minutes. Finish with a smooth final coat of frosting. Decorate as desired with Halloween-themed toppers, sprinkles, or ganache.
Notes
Use black gel food coloring for an intense black crumb without adding excess liquid.
Orange food coloring in the frosting creates a festive Halloween contrast.
Store the finished cake in the refrigerator. Bring to room temperature before serving.
To turn this into cupcakes, divide the batter into liners and reduce bake time to 18–20 minutes.
FAQs
Can I use regular food coloring instead of gel?
Gel food coloring is highly concentrated, which allows you to achieve a deep black color without adding excess liquid. Liquid food coloring is less intense and may water down the batter. For the best result, stick with gel-based color.
Can I make this cake ahead of time?
Yes, you can bake the cake layers a day or two in advance. Wrap them tightly in plastic wrap and store them at room temperature or refrigerate them. You can also frost the cake a day ahead and keep it chilled until serving.
Can I freeze the cake layers?
Absolutely. Once completely cooled, wrap each layer individually in plastic wrap and then aluminum foil. Freeze for up to 2 months. Thaw in the refrigerator overnight before assembling and frosting.
What if I don’t have buttermilk?
You can make a substitute by combining 1 cup of milk with 1 tablespoon of white vinegar or lemon juice. Let it sit for 5–10 minutes before using. This gives the same tangy flavor and reacts well with the leavening agents.
Can I use natural cocoa powder instead of Dutch-processed?
Dutch-processed cocoa gives the cake a darker color and richer flavor, which complements the Halloween theme. If you use natural cocoa powder, the color may be lighter and slightly more acidic in taste.