
Whenever I crave something crispy, flavorful, and comforting but don’t want to go overboard with heavy fried food, I turn to my baked zucchini fries. This recipe has become one of my go-to favorites, especially when I need a healthier side dish or snack that feels indulgent without being weighed down. I still remember the first time I baked zucchini fries instead of frying them—I wasn’t sure if I’d get that same irresistible crunch. To my delight, the result was golden, crisp on the outside, and tender inside. That memory is why this recipe always holds a special place in my kitchen.
What I love most about baked zucchini fries is how easy they are to prepare without breadcrumbs. Many traditional recipes rely on breadcrumbs, but I’ve learned that you don’t need them at all to achieve great texture. Instead, this version highlights the natural flavor of zucchini while keeping things light. It’s also an excellent choice for anyone avoiding bread or looking for gluten-free alternatives. These fries prove that you don’t have to sacrifice taste when making simple, wholesome swaps.
Why You Will Love This Recipe
You’ll love this recipe because it delivers on every level: flavor, texture, and health. The fries bake to a crisp, golden perfection without needing to be submerged in oil. They’re light enough to enjoy as a snack yet hearty enough to serve as a side dish with your favorite main course. Every bite balances the delicate sweetness of zucchini with a savory coating that satisfies your cravings.
Another reason this recipe stands out is that it’s naturally gluten-free. Since there are no breadcrumbs involved, the fries are suitable for a wide range of diets. That means you can serve them at gatherings or family dinners without worrying if they’ll suit everyone’s needs. Plus, because they’re baked, you don’t have the mess and heaviness that comes with frying.
Versatile
These zucchini fries are incredibly versatile. You can serve them with a simple dipping sauce like garlic yogurt, marinara, or even a homemade ranch. They make a wonderful side dish alongside roasted chicken, grilled beef, or a vegetarian main. You can also season them differently depending on your mood—add smoked paprika for warmth, parmesan for richness, or chili flakes for a little heat. Whether you’re planning a weeknight dinner, a weekend snack, or even a party appetizer, they fit right in.
Affordable
Another reason to love baked zucchini fries is their affordability. Zucchini is a budget-friendly vegetable that’s available in most markets all year round. The other ingredients used in this recipe are pantry staples, making it an economical choice that doesn’t compromise on flavor. You can easily make a generous batch without spending much, which makes it perfect for feeding a family or a group of friends.
Ingredients for the Recipe
-
Fresh zucchini
-
Olive oil
-
Grated parmesan cheese
-
Garlic powder
-
Onion powder
-
Paprika
-
Black pepper
-
Salt
How to Prepare This Recipe
Making baked zucchini fries at home is both simple and rewarding. The beauty of this recipe lies in the fact that you don’t need fancy equipment or complicated steps. With just a few everyday ingredients and a baking sheet, you can create a batch of crispy zucchini fries that will disappear quickly from the table. I always enjoy preparing them because the process is straightforward, yet the result feels special.
Step-by-Step Instructions for Preparation
Step 1: Prepare the zucchini
Start by washing the zucchini thoroughly under running water. Pat them dry with a clean kitchen towel to remove any excess moisture. This step is important because dry zucchini will bake more evenly. Once dry, trim off both ends of each zucchini. Slice the zucchini in half lengthwise, then cut each half into strips resembling fries. Try to keep the strips uniform in size so that they cook evenly in the oven.
Step 2: Preheat the oven
Before you move to seasoning, preheat your oven to 425°F (220°C). A hot oven is key for achieving crispy fries without breadcrumbs. Place a parchment-lined baking sheet on the counter so it’s ready for the seasoned zucchini.
Step 3: Season the zucchini strips
Place the zucchini strips into a large mixing bowl. Drizzle them with olive oil, then toss until every strip is lightly coated. The olive oil helps the seasoning stick and also promotes browning. Add grated parmesan cheese, garlic powder, onion powder, paprika, black pepper, and salt. Toss again until the zucchini fries are evenly coated. You should see the seasoning clinging nicely to the strips.
Step 4: Arrange on the baking sheet
Spread the zucchini strips out in a single layer on the prepared baking sheet. Avoid overcrowding them, because too many fries packed together will steam instead of bake. If necessary, use two baking sheets to ensure proper spacing.
Step 5: Bake until crisp
Slide the tray into the preheated oven. Bake for 20–25 minutes, flipping the fries halfway through the cooking time. The fries are ready when they are golden on the outside and tender inside. Depending on your oven, you may leave them in for a few extra minutes if you prefer them more crisp.
Step 6: Serve immediately
Remove the baking sheet from the oven and let the fries cool for just a minute or two. Transfer them to a serving plate and enjoy while warm. These fries are best eaten right away because that’s when they’re at their crispiest.
Quick and Easy
This recipe is quick enough to prepare on busy weeknights. From start to finish, it takes less than 40 minutes, and most of that time is passive while the fries bake in the oven. With only a handful of ingredients, you don’t need to make a special trip to the store. The simple process makes it a great choice when you want something homemade without spending hours in the kitchen.
Customizable
The fun part about baked zucchini fries is how easy they are to customize. You can swap parmesan for nutritional yeast if you want a dairy-free option. For extra crunch, you can sprinkle in some crushed cornflakes or almond flour. If you love bold flavors, try adding chili powder or smoked paprika. For a Mediterranean twist, mix in dried oregano and thyme. You can even pair them with different dipping sauces to create variety. No matter your preference, these fries adapt easily to your taste.
Popular with Many People
Zucchini fries have become increasingly popular because they are a healthier alternative to regular French fries. Many people appreciate that they are baked, not fried, and that they use simple ingredients. Kids love them because they look like fries but taste lighter, and adults enjoy them as a guilt-free snack or appetizer. Whenever I serve these at family gatherings or casual dinners, they tend to vanish quickly from the platter. Their popularity lies in the balance they strike between being delicious and wholesome.
PrintBaked Zucchini Fries – No Breadcrumbs!

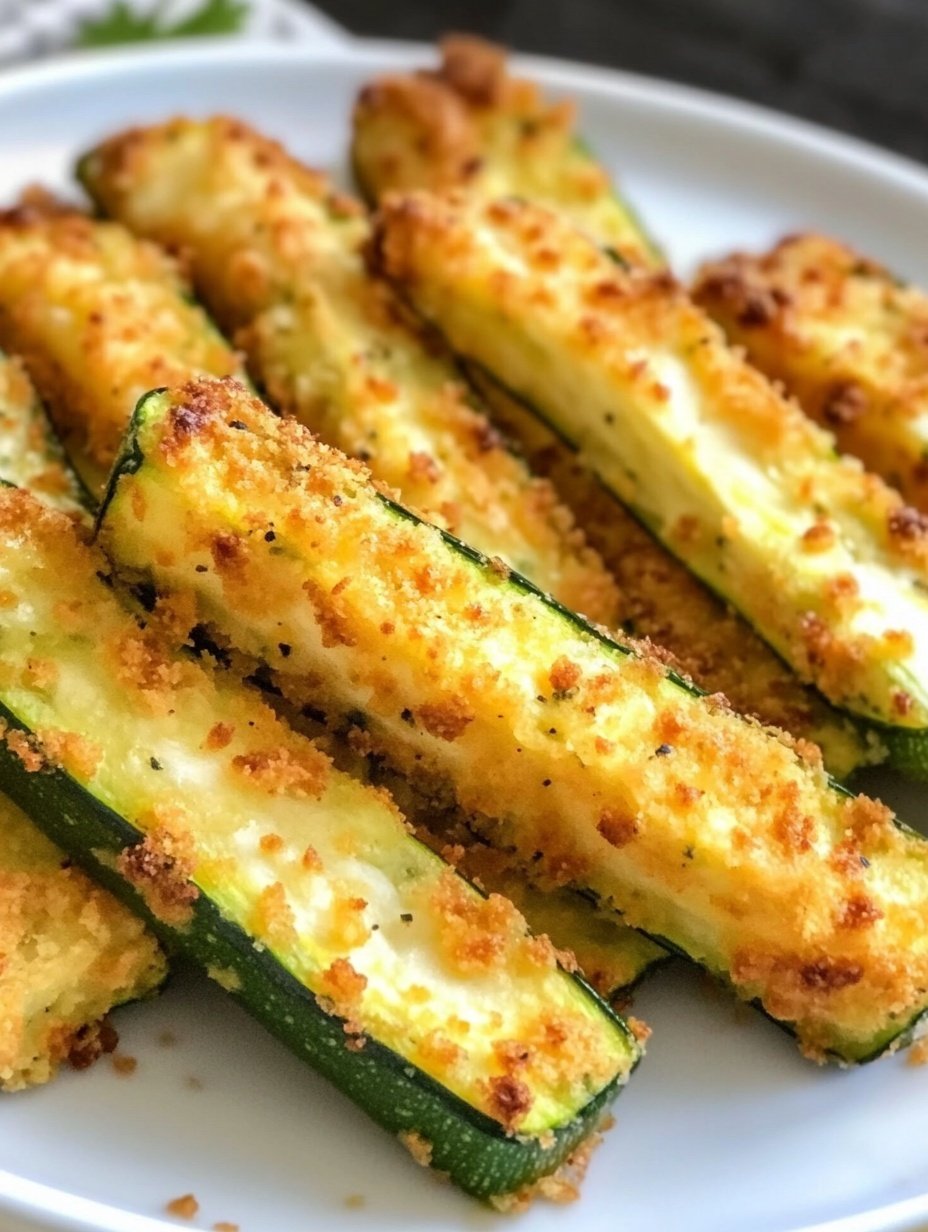
These baked zucchini fries are a light and crispy alternative to traditional fries. Made without breadcrumbs, they are naturally gluten-free, full of flavor, and simple to prepare. Perfect as a snack, side dish, or appetizer, they bake up golden on the outside and tender inside.
- Prep Time: 15
- Cook Time: 25
- Total Time: 40 minutes
- Yield: 4 1x
Ingredients
- 3 medium zucchinis
- 2 tablespoons olive oil
- ½ cup grated parmesan cheese
- 1 teaspoon garlic powder
- 1 teaspoon onion powder
- 1 teaspoon paprika
- ½ teaspoon salt
- ½ teaspoon black pepper
Instructions
- Wash the zucchinis thoroughly and pat them dry with a kitchen towel. Trim both ends.
- Slice the zucchinis in half lengthwise, then cut each half into strips that resemble fries. Keep the strips as uniform as possible for even cooking.
- Preheat your oven to 425°F (220°C). Line a baking sheet with parchment paper.
- Place the zucchini strips in a large mixing bowl. Drizzle with olive oil and toss until evenly coated.
- Add parmesan cheese, garlic powder, onion powder, paprika, salt, and pepper. Toss again until the seasoning sticks well to each strip.
- Spread the zucchini fries in a single layer on the prepared baking sheet. Leave space between each strip so they bake instead of steaming.
- Bake in the preheated oven for 20–25 minutes. Flip the fries halfway through to ensure both sides become golden and crisp.
- Remove from the oven once the fries are crisp and tender. Let them cool for one to two minutes, then serve immediately with your favorite dipping sauce.
Notes
For extra crispiness, sprinkle a little more parmesan on top before baking.
You can swap parmesan with nutritional yeast for a dairy-free version.
Avoid overcrowding the pan; use two trays if necessary.
These fries are best eaten fresh and warm.
FAQs
Can I make zucchini fries ahead of time?
Zucchini fries taste best straight out of the oven, but you can prepare the strips and season them in advance. Store them in the refrigerator until ready to bake. This way, you can pop them into the oven just before serving.
How do I keep zucchini fries from getting soggy?
To prevent sogginess, make sure to dry the zucchini well before seasoning. Avoid overcrowding the baking sheet, as this causes the fries to steam rather than crisp. Baking them at a high temperature also helps.
Can I use an air fryer for this recipe?
Yes, you can! Place the seasoned zucchini fries in a single layer in your air fryer basket. Cook them at 400°F (200°C) for about 10–12 minutes, flipping halfway through. They turn out crisp and flavorful.
Are zucchini fries gluten-free?
Absolutely. Since this recipe uses no breadcrumbs, it is naturally gluten-free. It is a good option for anyone looking to avoid wheat while still enjoying a crunchy snack.
What dipping sauces pair well with zucchini fries?
These fries are delicious with a variety of dips. You can serve them with marinara sauce, garlic yogurt dip, ranch dressing, or even a spicy sriracha mayo. Each sauce adds a unique flavor twist.