
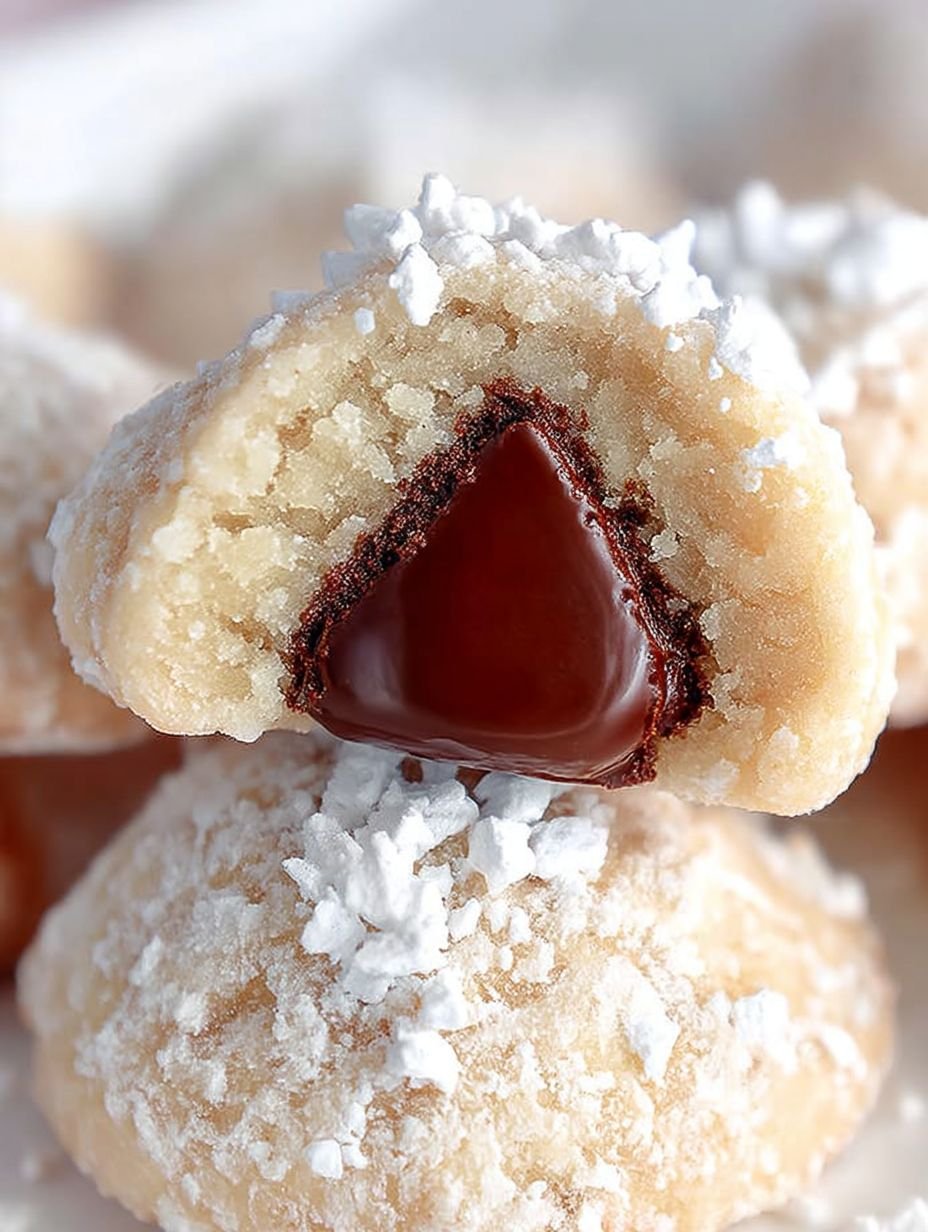
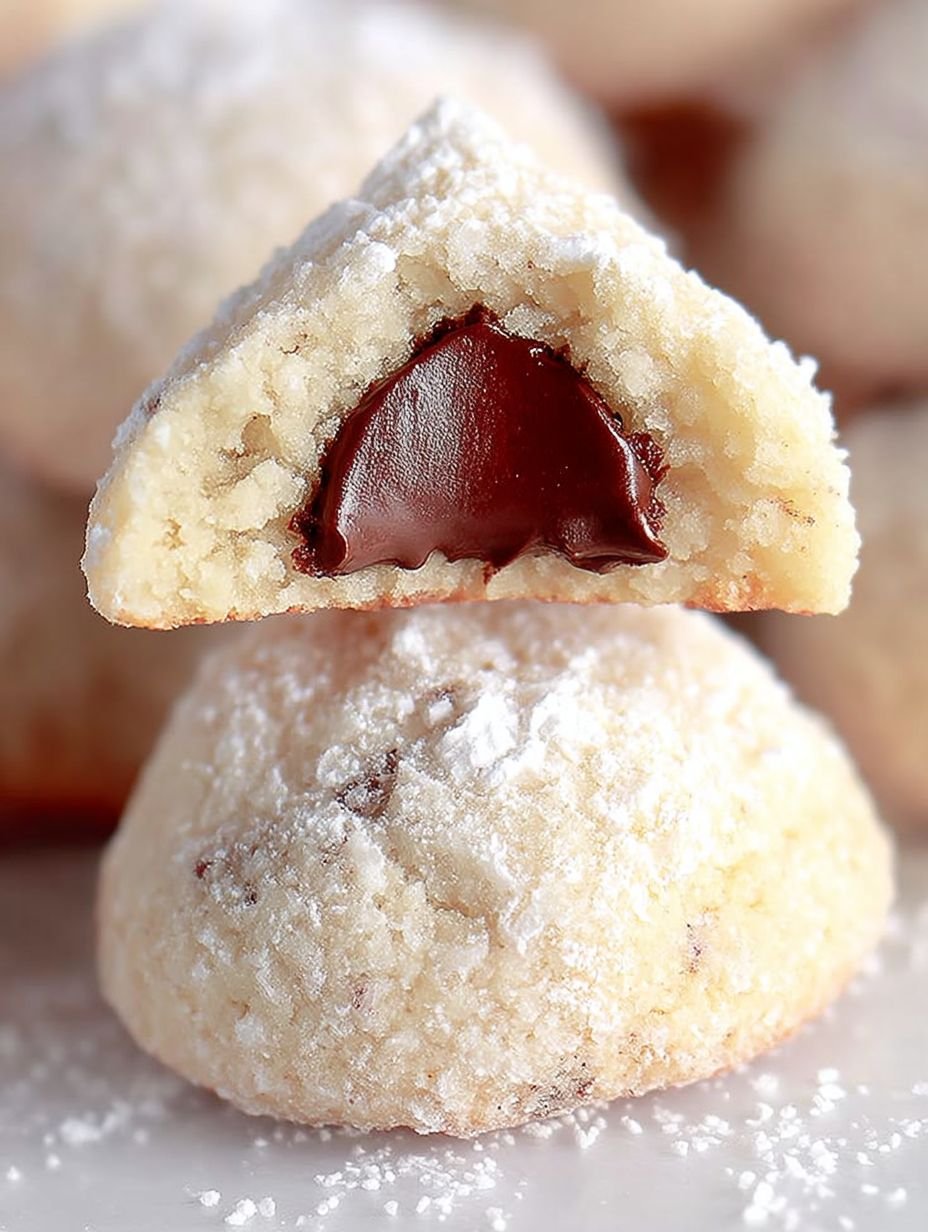
Imagine biting into a chewy cookie, the perfect harmony of sweet and nutty flavors melting in your mouth while a delightful chocolate surprise awaits at its center. The moment will have you questioning why you haven’t made these Kisses Cookies sooner.
I vividly remember my first attempt at baking cookies as a child; I mistook salt for sugar. Let’s just say, those “delicacies” led to some very confused faces at the family gathering. Fast forward to today, and I’m proud to say that Kisses Cookies are now my go-to recipe for impressing friends and family—no confusion here!
Why You’ll Love This Recipe
These Kisses Cookies are incredibly easy to prepare, making them perfect for both novice bakers and seasoned pros seeking a quick treat. Their unique flavor profile combines the subtleness of nut butter with rich chocolate, giving each bite a luxurious feel. They not only taste great but also look stunning with their glossy chocolate centers nestled atop a golden-brown cookie base, making them perfect for any occasion. Plus, they can be customized with your choice of nut butter or even fun toppings like sprinkles or chopped nuts.
Ingredients for Kisses Cookies
Here’s what you need for this delicious dish:
The complete ingredient list, including quantities, can be found directly under the recipe card.
How to Make Kisses Cookies
Follow these simple steps to prepare this delicious dish:
Step 1: Preheat the Oven
Begin by preheating your oven to 350°F (175°C). Line two baking sheets with parchment paper—you want these beauties to slide off easily after baking.
Step 2: Mix Dry Ingredients
In a medium bowl, whisk together 2 cups of all-purpose flour, 1 teaspoon of baking soda, and ½ teaspoon of salt. This mixture forms the foundation of our cookie dough—trust me, no one likes salty surprises!
Step 3: Cream Sugar and Nut Butter
In another large mixing bowl, cream together 1 cup of granulated sugar and ½ cup of creamy nut butter using an electric mixer on medium speed until smooth and fluffy (about 2-3 minutes). It should resemble clouds—sweet clouds!
Step 4: Add Vanilla and Combine
Lower the mixer speed and add in 1 teaspoon of vanilla extract. Gradually incorporate the dry ingredients into the wet mixture until combined. Don’t overmix; we want our dough tender!
Step 5: Shape Your Cookies
Using a cookie scoop or tablespoon, drop rounded balls of dough onto your prepared baking sheets about 2 inches apart (they’ll spread slightly). Flatten each ball gently with your palm—just enough to give them character!
Step 6: Bake & Add Chocolate Kisses
Bake in preheated oven for 10-12 minutes until they’re golden around the edges but still soft in the middle. Remove from oven, let cool on sheets for about 5 minutes before immediately pressing an unwrapped chocolate kiss into the center of each cookie—it melts slightly and creates that irresistible gooey effect.
Serve warm or at room temperature! Garnish with additional sprinkles if you fancy some extra flair. Enjoy every bite while basking in compliments from impressed friends who will undoubtedly ask you to share your secret recipe (wink wink)!
Mastering the Secrets of Cooking
To create perfect Kisses Cookies, start by preheating your oven while you mix the dough. This way, the butter stays soft and the cookies bake evenly. Always use room temperature ingredients for a smoother blend.
Make Your Recipe Unique
For a fun twist on Kisses Cookies, swap traditional chocolate kisses with caramel-filled candies or even pastel-colored chocolate gems for a festive touch. The possibilities are endless!
Smart Storage & Reheating
To maintain that delightful texture of Kisses Cookies, store them in an airtight container at room temperature. If you have filling, keep it separate until you’re ready to indulge.
The Chef’s Golden Tips
I remember the first time I baked Kisses Cookies; my kitchen was a floury mess, but the smiles from family made it all worth it!
Conclusion for Kisses Cookies
Kisses Cookies are a delightful treat that brings joy to any occasion. With their soft, chewy texture and sweet flavor, these cookies are perfect for sharing with friends and family. The simple ingredients make them accessible for bakers of all levels, while the versatility allows you to customize your cookies to suit your taste. Don’t miss out on the chance to indulge in these delicious morsels! Try making Kisses Cookies today and enjoy the warmth and comfort they bring to your home.
PrintKisses Cookies

Delicious kisses cookies recipe with detailed instructions and nutritional information.
- Prep Time: 30 minutes
- Cook Time: 25 minutes
- Total Time: 55 minutes
- Yield: 24 servings 1x
- Method: Bake
Ingredients
- 2 cups all-purpose flour, sifted
- 1 cup granulated sugar
- 1/2 cup creamy nut butter, well-stirred
- 1 teaspoon baking soda
- 1 teaspoon vanilla extract
- 1/2 teaspoon salt
- Chocolate Kisses, unwrapped
Instructions
- Preheat the oven to 350°F (175°C).
- Line two baking sheets with parchment paper.
- In a medium bowl, whisk together 2 cups of all-purpose flour, 1 teaspoon of baking soda, and ½ teaspoon of salt.
- In another large mixing bowl, cream together 1 cup of granulated sugar and ½ cup of creamy nut butter using an electric mixer on medium speed until smooth and fluffy.
- Lower the mixer speed and add in 1 teaspoon of vanilla extract.
- Gradually incorporate the dry ingredients into the wet mixture until combined.
- Using a cookie scoop or tablespoon, drop rounded balls of dough onto your prepared baking sheets about 2 inches apart.
- Flatten each ball gently with your palm.
- Bake in preheated oven for 10-12 minutes until they’re golden around the edges but still soft in the middle.
- Remove from oven and let cool on sheets for about 5 minutes before immediately pressing an unwrapped chocolate kiss into the center of each cookie.
Notes
Store cookies in an airtight container.
Reheat briefly in the microwave.
Serve with a glass of milk.
Chill dough for better texture.
Nutrition
- Calories: 150 kcal
- Sugar: 8g
- Sodium: 50mg
- Fat: 7g
- Carbohydrates: 20g
- Fiber: 3g
- Protein: 2g
- Cholesterol: 25mg
FAQs
How can I store leftover Kisses Cookies?
To keep your Kisses Cookies fresh, store them in an airtight container at room temperature. They will remain delicious for about a week. If you prefer a longer shelf life, consider freezing them. Place cooled cookies in a single layer on a baking sheet, freeze until solid, then transfer them to a freezer-safe container. This way, you can enjoy these treats later without sacrificing flavor or texture.
Can I use different types of chocolate for Kisses Cookies?
Absolutely! While this recipe suggests using chocolate kisses, feel free to experiment with different types of chocolate. Milk chocolate, dark chocolate, or even white chocolate can add unique flavors to your Kisses Cookies. Just ensure that the chocolate you choose is compatible with the other ingredients and melts well for the best results.
What can I substitute for butter in Kisses Cookies?
If you’re looking for a butter substitute in Kisses Cookies, you can use coconut oil or a plant-based margarine. Both options will maintain the moistness and flavor of your cookies. Just make sure to use a similar amount as specified in the recipe for optimal results.
How do I prevent my Kisses Cookies from spreading too much?
To prevent spreading, chill your cookie dough before baking. After mixing your ingredients, cover the dough and refrigerate it for at least 30 minutes. This helps firm up the fat, leading to thicker cookies that maintain their shape during baking. Additionally, using parchment paper on your baking sheets can help achieve even baking without excess spreading.