
A Short Story About the Recipe
I have always been a fan of cozy autumn desserts, and this Apple Butter Pie has become one of my most cherished creations. I remember the first time I made it on a crisp fall afternoon when the leaves were just beginning to turn golden. The aroma of warm spices and apples filled my kitchen, instantly putting me in a nostalgic mood. I wanted to create a dessert that tasted like fall in every bite – creamy, spiced, and comforting. This pie has since become a staple in my kitchen, and I love baking it whenever I want to share a little seasonal warmth with my friends and family. It is one of those recipes that feels like a warm hug on a chilly day.
Why You Will Love This Recipe
You will love this Apple Butter Pie because it is rich, smooth, and bursting with flavor. The filling is silky, spiced just right, and perfectly balanced with sweetness from the apple butter. It’s a great alternative to the classic pumpkin pie, especially for apple lovers who want something unique for the holidays. The crust adds a satisfying buttery crunch that pairs beautifully with the creamy filling, making each bite irresistible.
Versatile
This pie is incredibly versatile. You can use a homemade pie crust for a rustic, from-scratch experience, or take a shortcut with a store-bought crust when you’re short on time. You can even make this pie ahead of time and chill it overnight, making it perfect for holiday gatherings or potlucks. It is also a great recipe to experiment with different toppings like whipped cream, caramel drizzle, or even a sprinkle of toasted nuts for extra texture.
Affordable
Another reason this recipe is so great is its affordability. Apple butter is easy to find, and most of the other ingredients like eggs, sugar, and milk are pantry staples. You don’t need fancy or expensive ingredients to make this pie taste incredible. It’s a budget-friendly dessert that delivers an elegant presentation and crowd-pleasing flavor.
Ingredients for the Recipe
To make this delicious Apple Butter Pie, you will need the following ingredients:
-
1 unbaked 9-inch pie crust (homemade or store-bought)
-
1 cup apple butter
-
3 large eggs
-
1 cup evaporated milk
-
½ cup granulated sugar
-
2 tablespoons all-purpose flour
-
1 teaspoon ground cinnamon
-
¼ teaspoon ground nutmeg
-
¼ teaspoon ground ginger
-
¼ teaspoon salt
-
1 teaspoon vanilla extract
How to Prepare This Recipe
Making Apple Butter Pie is simpler than you might think, and the results are absolutely worth it. This is a dessert that feels special but does not require advanced baking skills. You will only need one bowl, a whisk, and a pie dish, making cleanup easy.
Step-by-Step Instructions for Preparation
Step 1: Prepare the Crust
Start by preparing your pie crust. If you are using a homemade crust, roll it out on a lightly floured surface until it is about 12 inches in diameter. Carefully transfer it to a 9-inch pie dish, pressing it gently into the bottom and sides. Trim any overhanging dough, leaving about an inch to fold under and crimp for a neat edge. If you are using a store-bought crust, simply unroll it and fit it into the dish. Place the prepared crust in the refrigerator while you prepare the filling. Keeping the crust cold will help it stay flaky during baking.
Step 2: Make the Filling
In a large mixing bowl, combine the apple butter, eggs, evaporated milk, sugar, flour, cinnamon, nutmeg, ginger, salt, and vanilla extract. Use a whisk to mix until the filling is smooth and well combined. This step ensures that all the spices are evenly distributed so that every slice has a balanced flavor. The filling should have a slightly thick, custard-like consistency at this point.
Step 3: Assemble the Pie
Remove the chilled pie crust from the refrigerator and pour the filling into the shell. Use a spatula to spread the filling evenly, smoothing the top so that the pie bakes evenly. The filling should reach close to the top edge of the crust, leaving just a little space to prevent overflow during baking.
Step 4: Bake the Pie
Preheat your oven to 350°F (175°C). Place the pie on the center rack of the oven. Bake for 50–60 minutes, or until the filling is set but still slightly wobbly in the center. The edges should look firm and the crust should be golden brown. If the crust begins to brown too quickly, you can cover the edges with aluminum foil to prevent burning.
Step 5: Cool the Pie
Once baked, remove the pie from the oven and let it cool completely on a wire rack. This step is important because the filling will continue to set as it cools, giving you clean slices when you cut it later. Cooling may take about two hours, so be patient.
Step 6: Chill Before Serving (Optional)
Although this pie can be served at room temperature, chilling it in the refrigerator for a couple of hours will make the texture even creamier. Cover the cooled pie loosely with plastic wrap before placing it in the fridge.
Quick and Easy
This Apple Butter Pie is quick to prepare, taking just 15 minutes to mix together before baking. Most of the time is hands-off as it bakes and cools, so you can work on other dishes while it’s in the oven. Because it uses apple butter, you don’t need to cook apples or peel anything, saving you time and effort.
Customizable
You can easily customize this recipe to suit your tastes. If you like a bolder spice flavor, add a pinch of cloves or cardamom to the filling. For a dairy-free version, replace evaporated milk with coconut milk or oat milk. You can also swap the regular pie crust for a graham cracker crust for a slightly different texture and flavor. For a decorative finish, consider adding pie crust cutouts on top before baking for a beautiful presentation.
Popular with Many People
Apple Butter Pie is always a hit at family gatherings and holiday tables. Its unique flavor makes it stand out among other desserts, and it appeals to both kids and adults. Even those who don’t usually like pie are often pleasantly surprised by how smooth and flavorful this dessert is. Whether you serve it at Thanksgiving, Christmas, or a casual fall dinner, it will be a recipe that everyone asks you to make again.
PrintApple Butter Pie

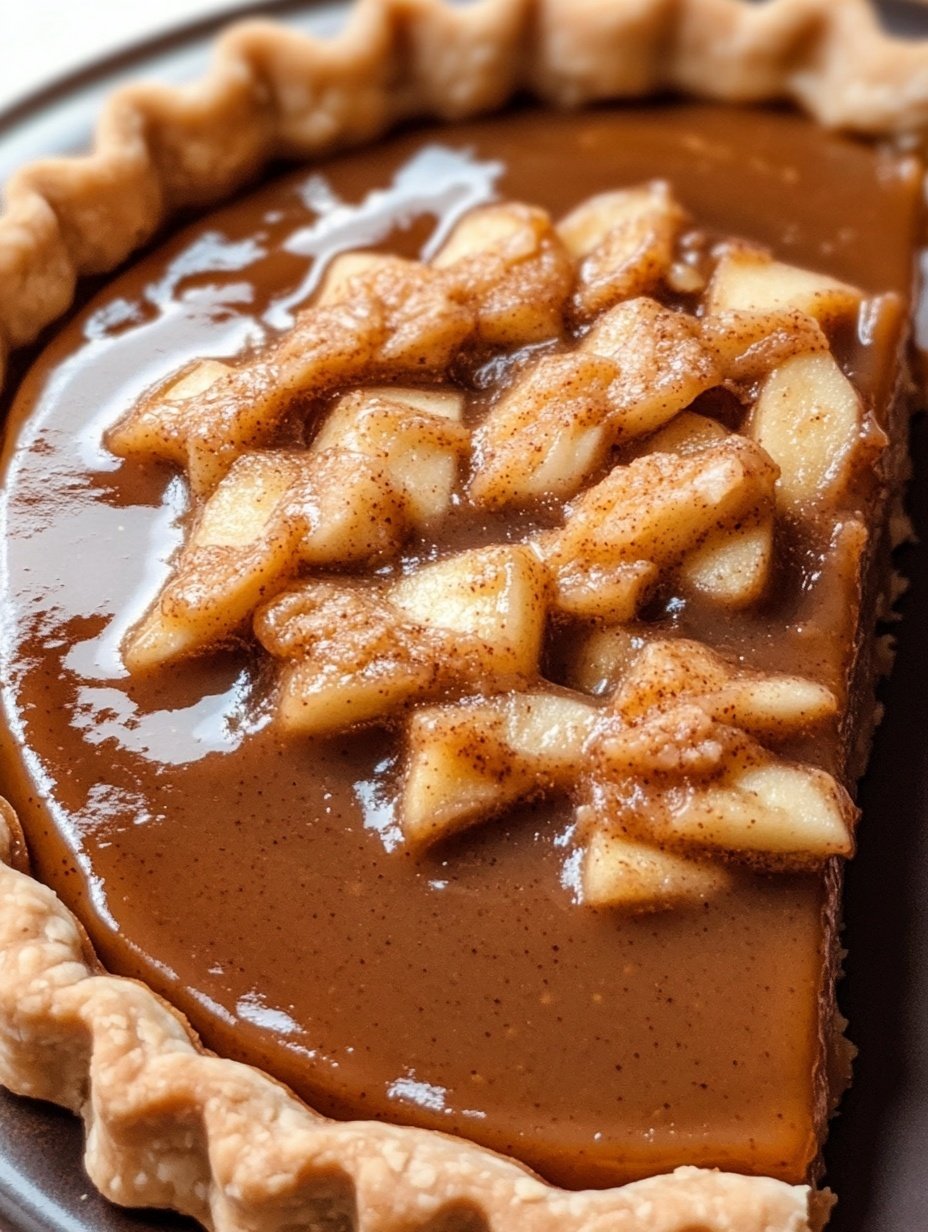
This Apple Butter Pie is a creamy, spiced dessert that captures the flavors of fall. Smooth, buttery, and packed with warm spices, it’s perfect for family gatherings, holidays, or any cozy evening. The filling is made with apple butter, creating a rich custard-like texture that pairs beautifully with a flaky pie crust.
- Prep Time: 15
- Cook Time: 60
- Total Time: 1 hour 15 minutes
- Yield: 8 1x
Ingredients
- 1 unbaked 9-inch pie crust (homemade or store-bought)
- 1 cup apple butter
- 3 large eggs
- 1 cup evaporated milk
- ½ cup granulated sugar
- 2 tablespoons all-purpose flour
- 1 teaspoon ground cinnamon
- ¼ teaspoon ground nutmeg
- ¼ teaspoon ground ginger
- ¼ teaspoon salt
- 1 teaspoon vanilla extract
Instructions
- Prepare the crust: Roll out the pie crust on a lightly floured surface if homemade, and transfer it to a 9-inch pie dish. Press gently into the bottom and sides, trim excess dough, and crimp edges. Chill while preparing filling.
- Mix the filling: In a large bowl, whisk together apple butter, eggs, evaporated milk, sugar, flour, cinnamon, nutmeg, ginger, salt, and vanilla extract until smooth.
- Assemble the pie: Pour the filling into the chilled pie crust, smoothing the top with a spatula.
- Preheat oven: Set oven to 350°F (175°C).
- Bake: Place pie on center rack. Bake for 50–60 minutes until the filling is set but slightly wobbly in the center and crust is golden brown. Cover edges with foil if browning too fast.
- Cool: Remove from oven and let cool on a wire rack for about 2 hours to fully set.
- Chill (optional): Cover loosely and refrigerate for a firmer texture and easier slicing.
- Serve: Slice and enjoy as is or with whipped cream or caramel drizzle.
Notes
Keep the pie crust chilled before baking to ensure flakiness.
Avoid overbaking to maintain a creamy filling.
Customize by adding nuts, spices, or a decorative crust.
FAQs
1. Can I use a store-bought pie crust?
Yes, you can use a store-bought crust to save time. Just make sure it fits a 9-inch pie dish and keep it chilled until ready to fill.
2. How long can I store Apple Butter Pie?
You can store the pie in the refrigerator for up to 4 days. Cover it loosely with plastic wrap to maintain freshness.
3. Can I make this pie ahead of time?
Absolutely. You can prepare the pie a day in advance and refrigerate it. This also helps the filling set and improves slicing.
4. Can I freeze the pie?
Yes, the pie can be frozen for up to 2 months. Wrap it tightly in plastic wrap and aluminum foil. Thaw in the refrigerator before serving.
5. Can I make a dairy-free version?
Yes, substitute evaporated milk with coconut milk or any other plant-based milk for a dairy-free version.
6. How can I tell when the pie is done baking?
The pie is done when the filling is set but slightly wobbly in the center, and the crust is golden brown. Avoid overbaking to maintain a creamy texture.
7. Can I add toppings?
Yes, top with whipped cream, caramel drizzle, or toasted nuts for extra flavor and texture.