
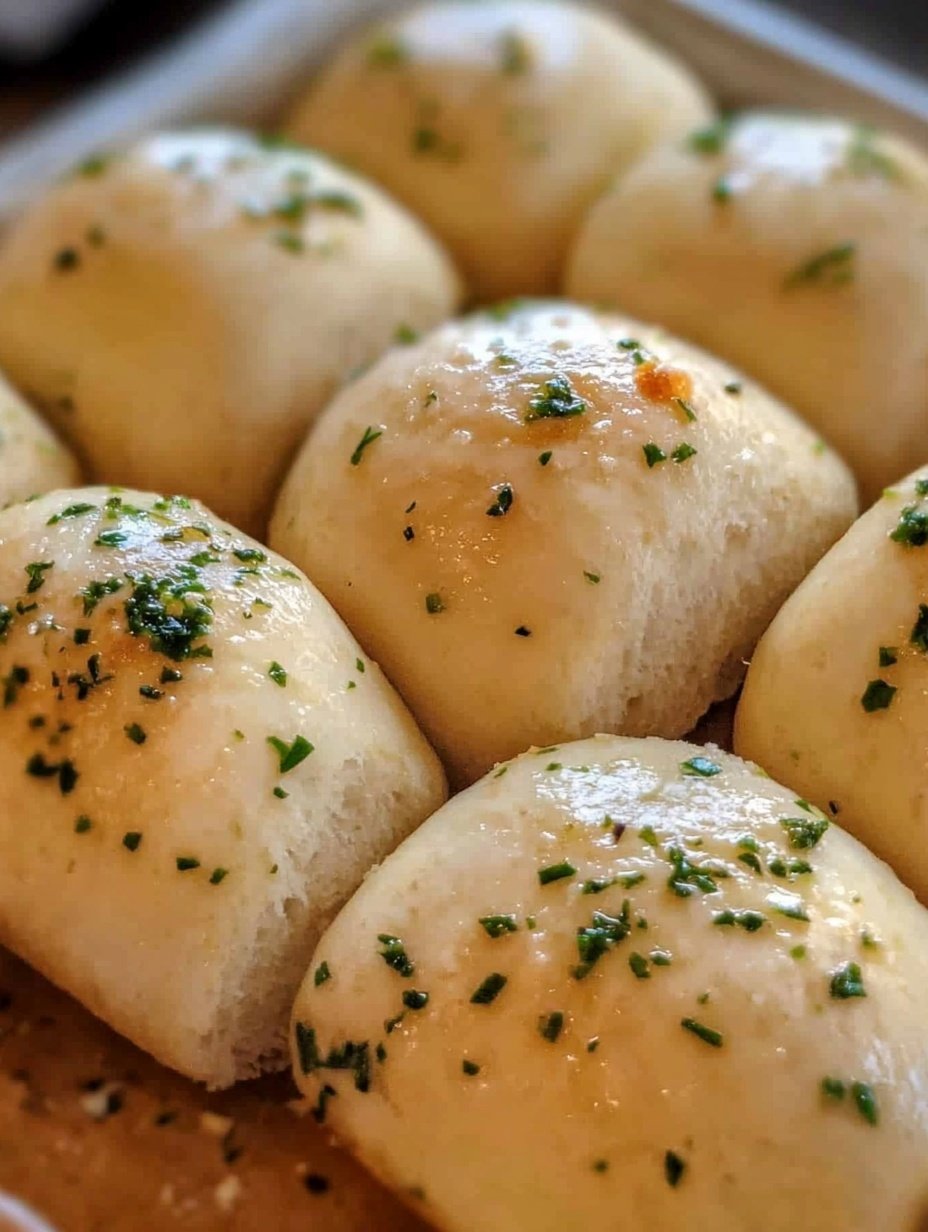
I have always loved the smell of fresh bread baking in the kitchen. There is something magical about the way the aroma of warm dough, garlic, and butter fills the air, instantly making a home feel cozy and inviting. That is why I created this Easy Garlic Bread Rolls recipe. It brings together soft, fluffy bread with a rich, garlicky flavor that melts in your mouth. Every time I bake these rolls, I am reminded of family gatherings and the simple joy of sharing freshly baked bread with loved ones.
You will love this recipe because it is incredibly satisfying and approachable. Even if you have never made bread from scratch before, the steps are straightforward, and the results are impressive. The rolls come out perfectly golden on the outside, tender on the inside, and bursting with garlic flavor. Plus, they pair wonderfully with almost any meal, whether it’s a hearty soup, a fresh salad, or a comforting pasta dish.
This recipe is highly versatile. You can serve the rolls plain, or add extra toppings like melted cheese, herbs, or seeds. They also freeze well, which means you can enjoy them later without compromising their freshness. You can even use the dough to create different shapes, like knots, twists, or mini loaves, depending on your mood or occasion.
It is also affordable. The ingredients are simple pantry staples, and you don’t need any special equipment. A little flour, yeast, sugar, salt, butter, and garlic are all it takes to make a batch of these irresistible rolls. There’s no need for expensive additives or specialty flours—this recipe proves that homemade bread can be delicious and budget-friendly.
Ingredients:
-
3 ½ cups all-purpose flour
-
2 ¼ teaspoons active dry yeast
-
1 teaspoon sugar
-
1 teaspoon salt
-
1 cup warm water
-
2 tablespoons olive oil or softened butter
-
4 cloves garlic, finely minced
-
2 tablespoons fresh parsley, chopped
-
¼ cup butter, melted, for brushing
-
Optional: shredded cheese for topping
These Easy Garlic Bread Rolls are perfect for baking enthusiasts, busy home cooks, and anyone who loves fresh, flavorful bread. With a few simple steps, you can create a batch of warm, aromatic rolls that will impress your family and friends.
How to Prepare This Recipe
Making these Easy Garlic Bread Rolls is simpler than it looks, and the results are always rewarding. The key is to follow each step carefully, allow the dough to rise properly, and ensure the garlic butter is flavorful and evenly distributed. This method is quick, easy, and highly customizable, so you can adapt it to your taste while keeping the rolls soft, fluffy, and aromatic.
Step-by-Step Instructions
-
Activate the yeast: Start by combining the warm water, sugar, and active dry yeast in a small bowl. Stir gently, then let it sit for 5–10 minutes. You will know the yeast is active when it becomes frothy on top. This ensures your bread rolls will rise perfectly.
-
Prepare the dough: In a large mixing bowl, combine the all-purpose flour and salt. Make a well in the center and pour in the yeast mixture and olive oil (or softened butter). Mix the ingredients gradually until a sticky dough forms.
-
Knead the dough: Transfer the dough to a lightly floured surface and knead for 8–10 minutes. Kneading helps develop gluten, giving the bread a soft yet structured texture. Continue until the dough is smooth, elastic, and slightly tacky but not sticky.
-
First rise: Place the dough in a lightly greased bowl, cover it with a clean kitchen towel, and let it rise in a warm place for 1–1.5 hours, or until it has doubled in size. Using a warm, draft-free environment ensures the yeast works efficiently.
-
Prepare the garlic butter: While the dough is rising, combine the melted butter, minced garlic, and chopped parsley in a small bowl. Mix well to create a fragrant, flavorful spread that will be brushed onto the rolls later.
-
Shape the rolls: Once the dough has risen, punch it down to release air bubbles. Divide it into 12–16 equal portions, depending on your preferred roll size. Shape each piece into a smooth ball and arrange them on a greased or parchment-lined baking tray, leaving a small gap between each roll.
-
Second rise: Cover the shaped rolls with a kitchen towel and allow them to rise for 30–45 minutes. This second rise ensures the rolls are light, fluffy, and airy.
-
Preheat the oven: While the rolls are rising, preheat your oven to 375°F (190°C).
-
Add the garlic butter: Once the rolls have puffed up, gently brush the garlic butter over the tops. If desired, sprinkle shredded cheese over the rolls for a cheesy variation.
-
Bake the rolls: Place the tray in the preheated oven and bake for 20–25 minutes, or until the rolls are golden brown on top and sound hollow when tapped.
-
Final touch: After baking, brush the rolls again with a little more garlic butter for extra flavor. Let them cool slightly before serving to enhance their softness and aroma.
Quick and Easy Tips
-
You can prepare the dough the night before and refrigerate it for a slower rise. This adds depth of flavor and allows for a flexible baking schedule.
-
For extra flavor, add finely chopped herbs like rosemary or thyme to the garlic butter.
-
These rolls are great for freezing. Wrap them individually in plastic wrap and store in a freezer bag for up to a month. Reheat in the oven before serving.
Customizable Options
-
Cheesy rolls: Sprinkle shredded mozzarella, cheddar, or parmesan over the garlic butter before baking.
-
Herb variations: Add basil, oregano, or chives to the butter mixture for unique flavors.
-
Mini rolls: Reduce the size of each dough portion for bite-sized rolls that are perfect for parties.
These Easy Garlic Bread Rolls are popular with many people because of their soft texture, rich garlic flavor, and versatility. They can be served alongside soups, salads, pastas, or even as a snack on their own. Their simplicity, affordability, and customizable nature make them a favorite in many households.
PrintEasy Garlic Bread Rolls Recipe | Yummy Kitchen Baking
These Easy Garlic Bread Rolls are soft, fluffy, and bursting with garlic flavor. Perfect as a side for soups, salads, or pasta, they are quick to prepare, budget-friendly, and customizable to suit any taste.
- Prep Time: 20
- Cook Time: 25
- Total Time: 45 minutes
- Yield: 16 1x
Ingredients
- 3 ½ cups all-purpose flour
- 2 ¼ teaspoons active dry yeast
- 1 teaspoon sugar
- 1 teaspoon salt
- 1 cup warm water
- 2 tablespoons olive oil or softened butter
- 4 cloves garlic, finely minced
- 2 tablespoons fresh parsley, chopped
- ¼ cup butter, melted, for brushing
- Optional: shredded cheese for topping
Instructions
- Activate the yeast: Combine warm water, sugar, and yeast in a small bowl. Stir gently and let sit 5–10 minutes until frothy.
- Mix dough: In a large bowl, combine flour and salt. Make a well and add yeast mixture and olive oil (or softened butter). Mix until a sticky dough forms.
- Knead: Transfer to a floured surface and knead 8–10 minutes until smooth and elastic.
- First rise: Place dough in a greased bowl, cover, and let rise 1–1.5 hours until doubled in size.
- Prepare garlic butter: Mix melted butter, minced garlic, and parsley in a small bowl.
- Shape rolls: Punch down dough, divide into 12–16 portions, shape into balls, and place on a greased or parchment-lined tray.
- Second rise: Cover and let rise 30–45 minutes until puffed.
- Preheat oven: Preheat to 375°F (190°C).
- Add garlic butter: Brush tops with garlic butter. Optionally, sprinkle shredded cheese.
- Bake: Bake 20–25 minutes until golden brown and hollow-sounding when tapped.
- Final touch: Brush extra garlic butter over rolls after baking. Cool slightly before serving.
Notes
Dough can be refrigerated after first rise for slower fermentation.
Add herbs like rosemary, thyme, or chives for extra flavor.
Freezing individual rolls preserves freshness for up to a month.
FAQs
Q: Can I use whole wheat flour instead of all-purpose flour?
A: Yes, you can substitute up to half of the all-purpose flour with whole wheat flour. Keep in mind the texture may be slightly denser, and you might need a little extra water to achieve the right dough consistency.
Q: How long do the rolls stay fresh?
A: These garlic bread rolls stay fresh at room temperature for 2–3 days if stored in an airtight container. You can also freeze them for up to a month and reheat in the oven before serving.
Q: Can I make the dough ahead of time?
A: Absolutely. After the first rise, you can refrigerate the dough for up to 12 hours. Bring it to room temperature before shaping and baking.
Q: Can I use garlic powder instead of fresh garlic?
A: Yes, but fresh garlic gives the rolls a stronger, more aromatic flavor. If using garlic powder, use about 1–1.5 teaspoons and mix it with the melted butter before brushing.
Q: Can I make vegan garlic bread rolls?
A: Yes. Replace butter with a plant-based alternative and use a dairy-free milk or oil. The rolls will still be soft and flavorful.